

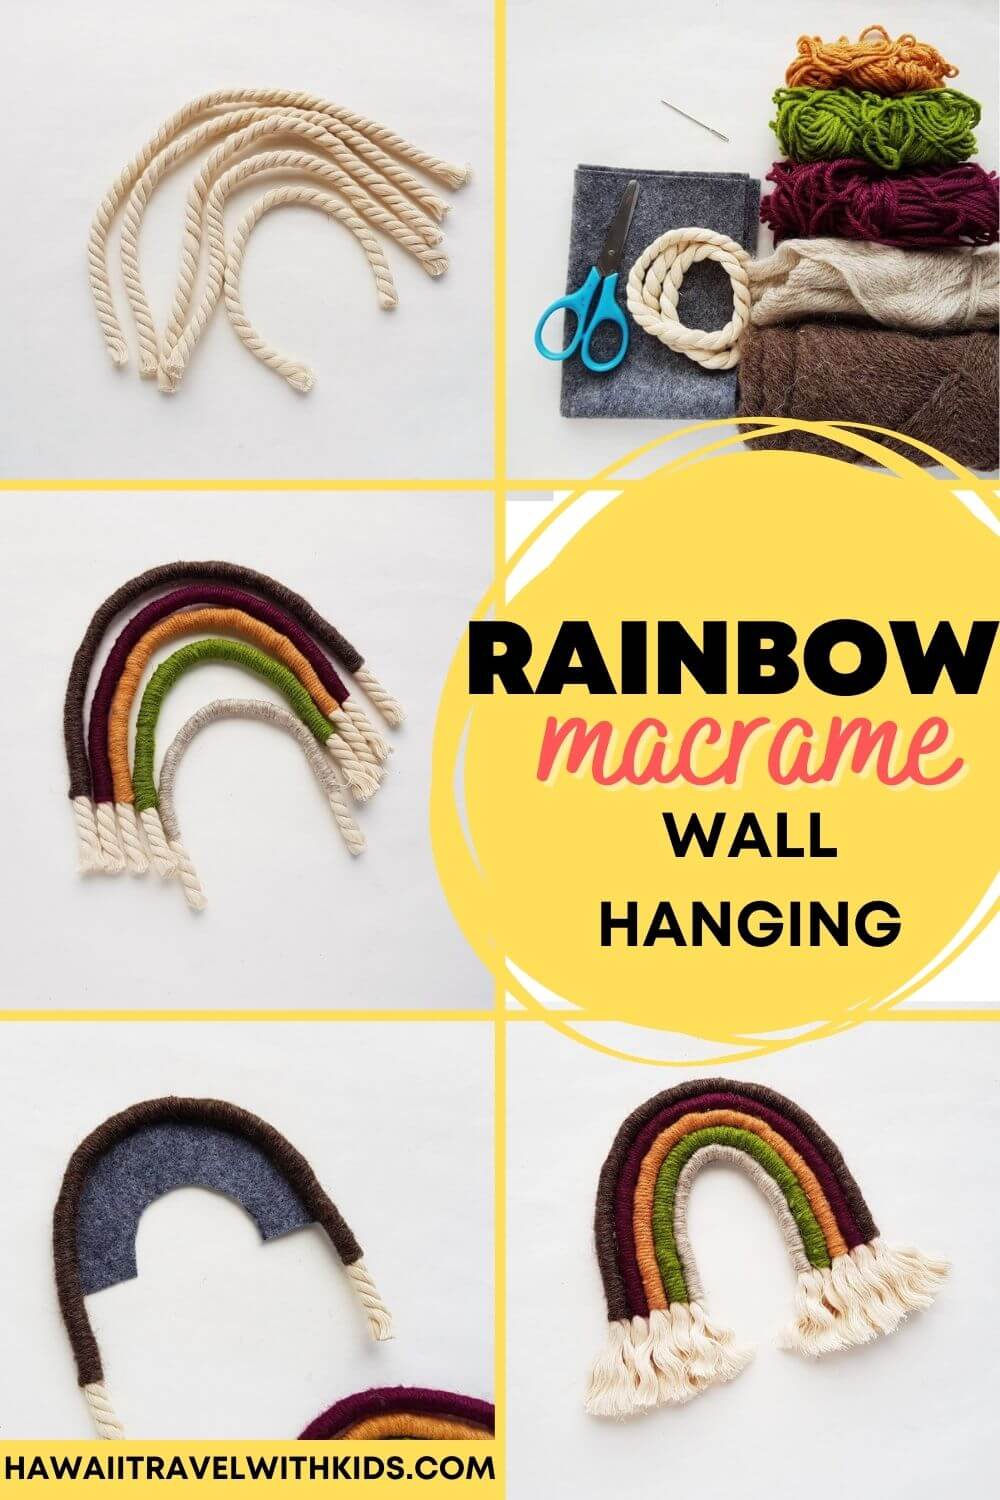
Are you looking for easy rainbow crafts for adults? Scroll to find out how to make your own rainbow macrame wall hanging that’s perfect for rainbow nursery decor or giving as a gift!
This macrame rainbow wall hanging tutorial contains affiliate links which means if you purchase something from one of my affiliate links, I may earn a small commission that goes back into maintaining this blog.
One of my favorite games to play with my kids in Hawaii is “Spot the Rainbow.”
We see SO many majestic rainbows on every trip to Hawaii that every time I see a rainbow anywhere else in the world, I immediately think of Hawaii.
This past summer, I started doing some easy macrame for beginners. I couldn’t believe how relaxing it was and how nice the final result ended up looking.
Because I’m always on the hunt for fun DIY Hawaiian decorations that people can use for baby showers, birthday parties, and summer parties, I thought this was the perfect opportunity to work on some rainbow wall art!
This DIY macrame rainbow is super easy, and you can easily change it up with different colors or shades of colors to personalize it.
For this rope rainbow wall hanging, we used more Fall colors to make it muted and work in different spaces.
But, you could totally use super bright colors for your rainbow birthday decorations to make them really pop.
Ok, let me show you exactly how to make this rainbow wall hanging DIY craft!
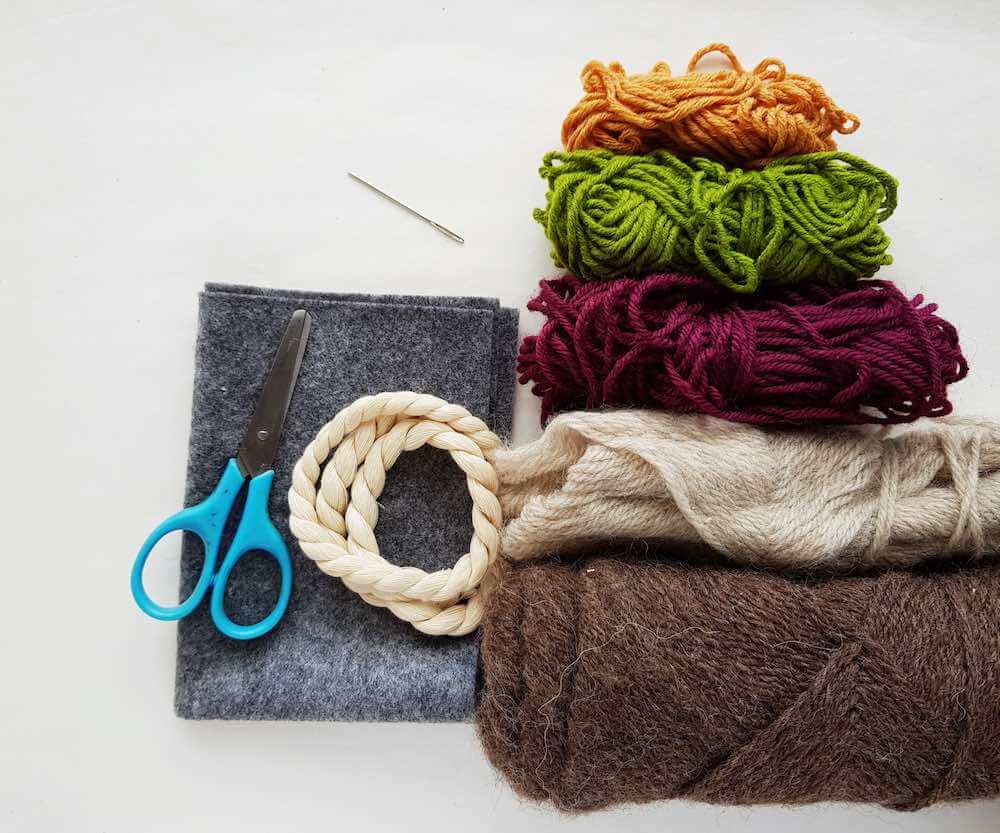
Macrame Rainbow Wall Hanging Supplies
- Naturally twisted rope (1 cm thick)
- Twines and colorful yarns
- Felt
- Craft glue or hot glue
- Pencil
- Scissors
- Needle
How to Make Macrame Rainbow Wall Hanging
Follow this macrame rainbow pattern to make a small macrame rainbow. If you want a bigger or mini rainbow, just change up the following lengths to make it a bit shorter or longer to fit your needs.
Step 1:
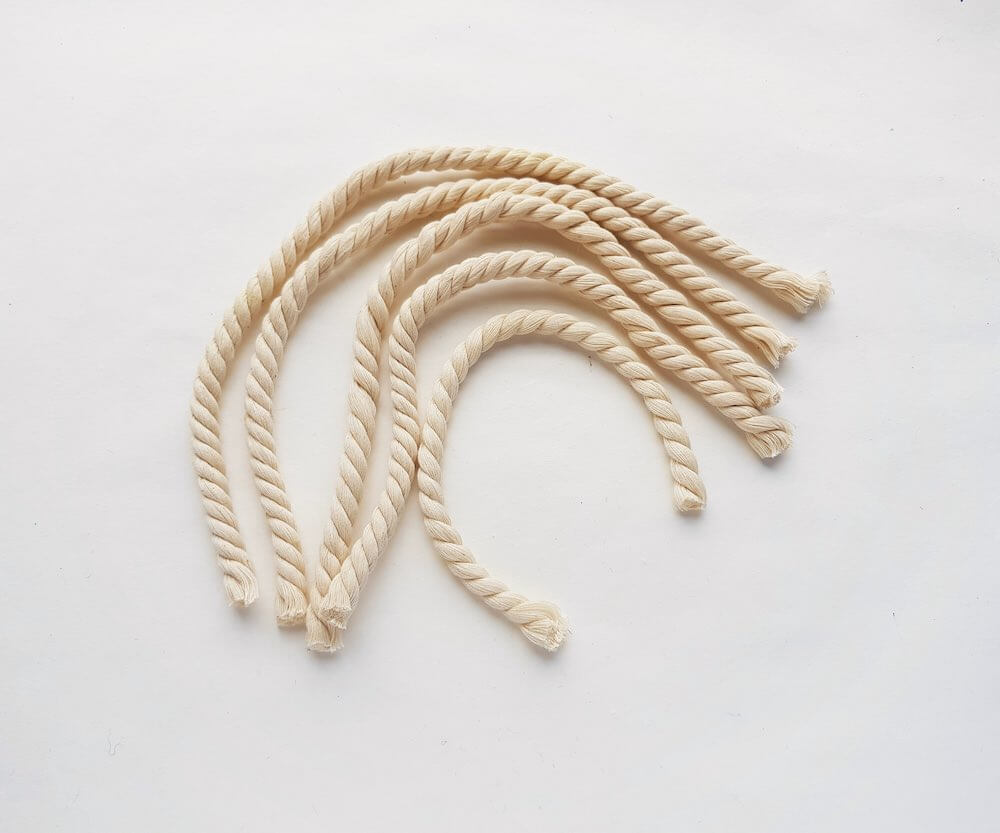
Decide the number of layers for the rainbow and cut ropes accordingly.
Place the rope on a flat surface by forming a rainbow curve, and measure, mark, and cut the ropes for each layer of the macramé rainbow. I’m creating a macramé rainbow with 5 layers.
Step 2:
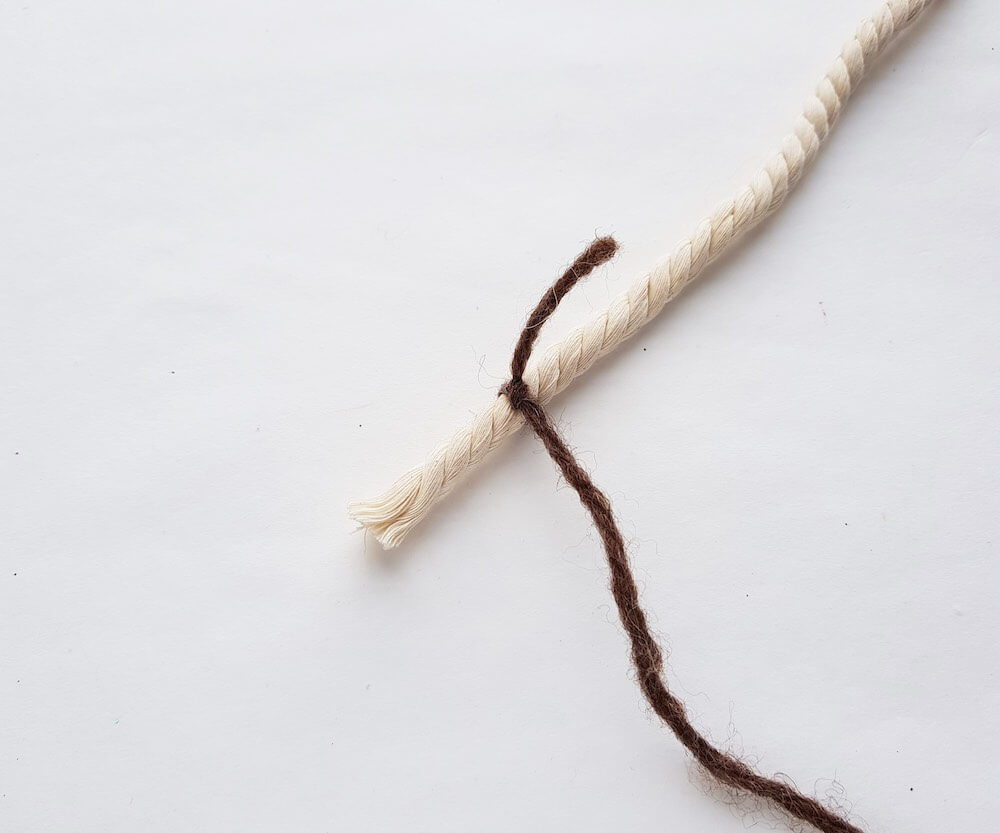
Grab any one of the ropes. Leave an inch intact from the end of the rope, and then tie a knot around the rope using a colorful yarn of your choice. Do not cut the yarn from its bundle yet.
Step 3:
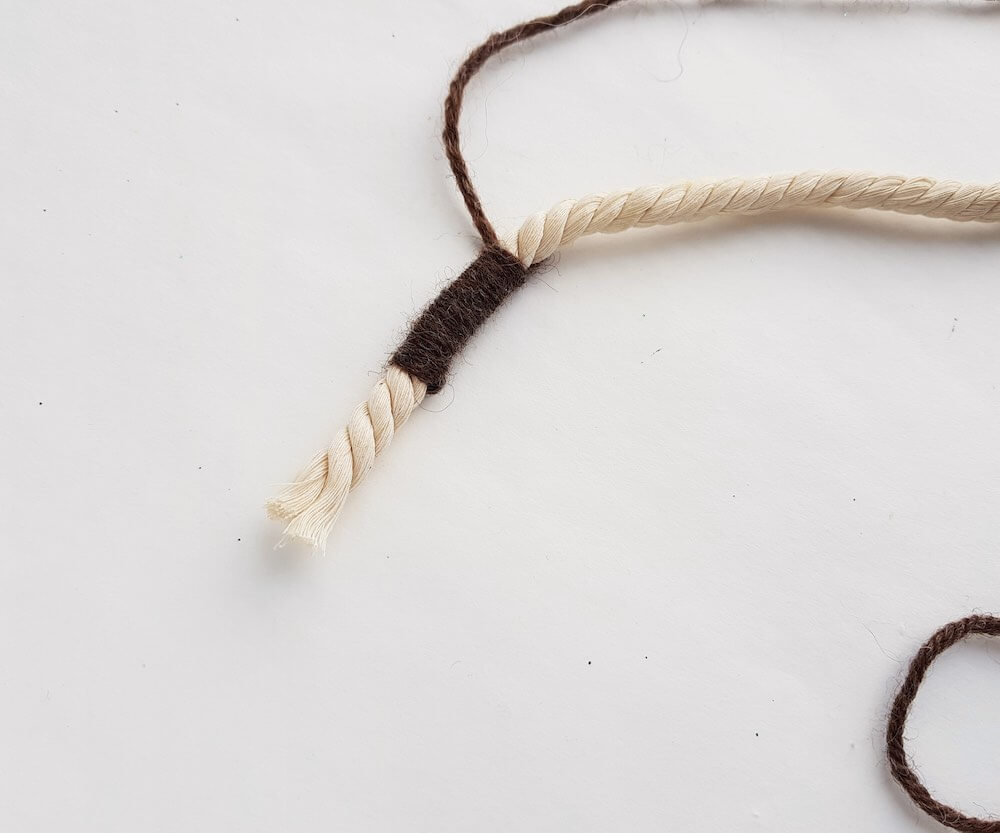
Align the short end of the tied yarn with the rope and wrap the rope using the yarn. Keep the wrapping nice and adjacent, making sure that the rope is not visible.
Step 4:
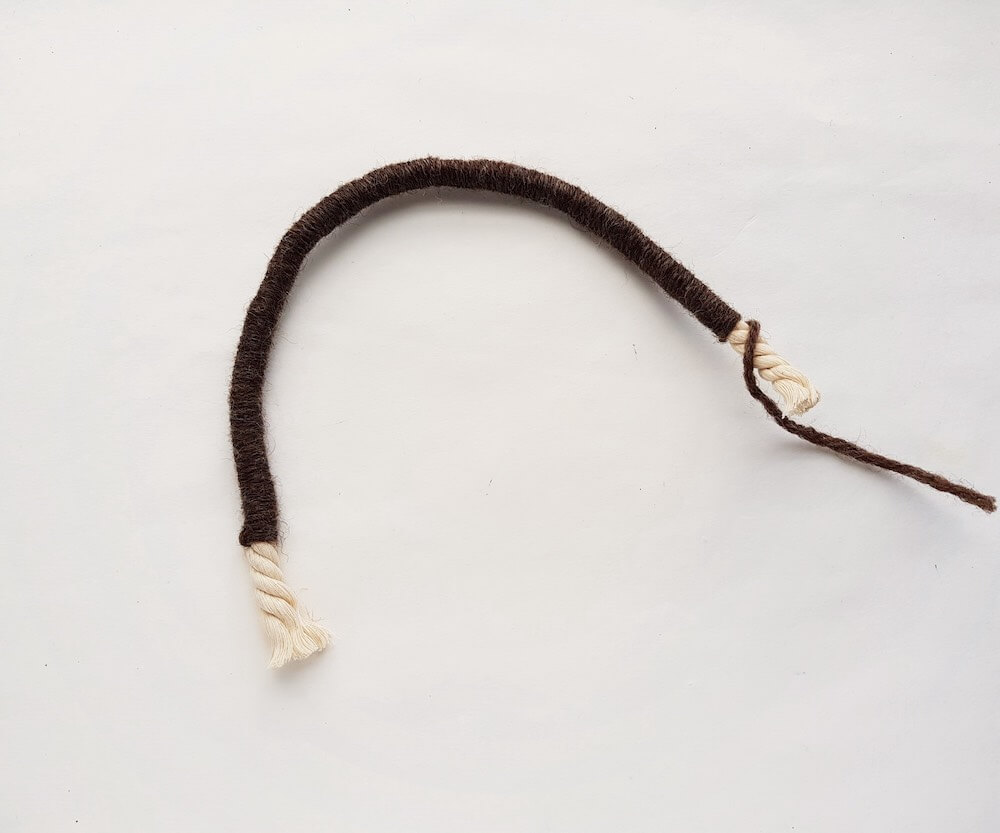
Continue to wrap the yarn around the rope all the way to its other end but make sure to leave an inch intact on that end as well. Gently manipulate so that you don’t see any rope visible, and continue the wrapping rotation.
Step 5:
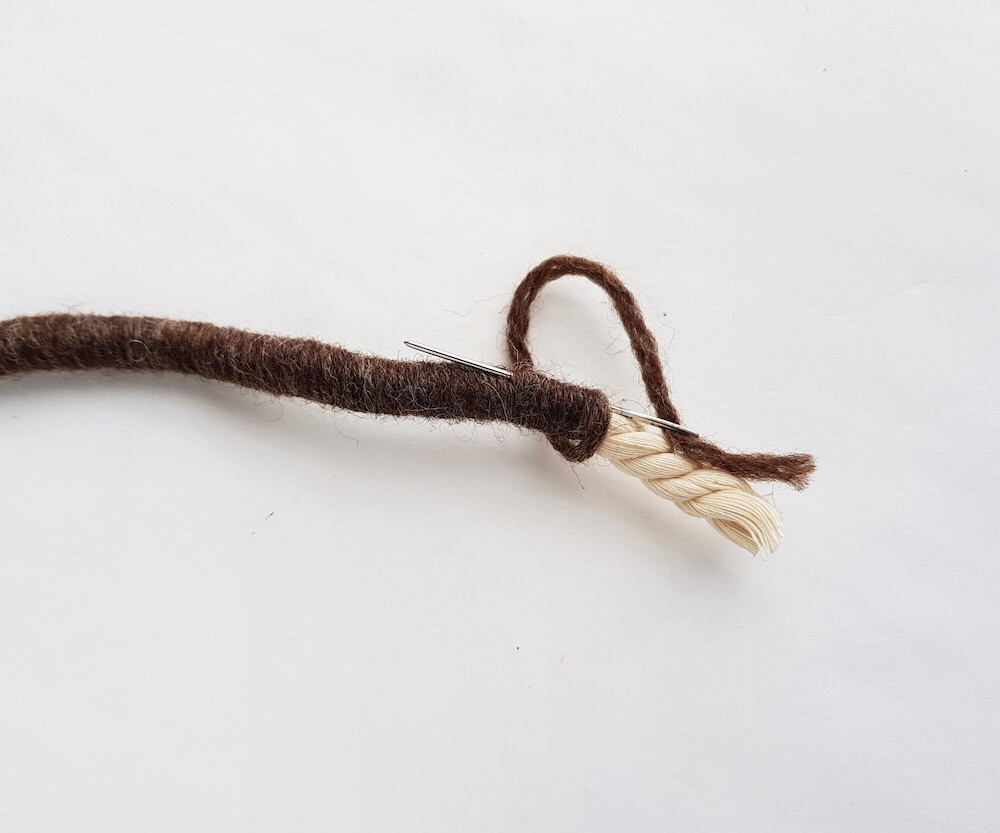
Keep 2 or 3 inches of yarn and cut off the yarn string from its bundle. Insert a tapestry needle through the open end of the yarn string.
Draw the needle through the wrapped yarn (around the rope). Pull the needle out and cut off extra yarn if necessary.
Step 6:
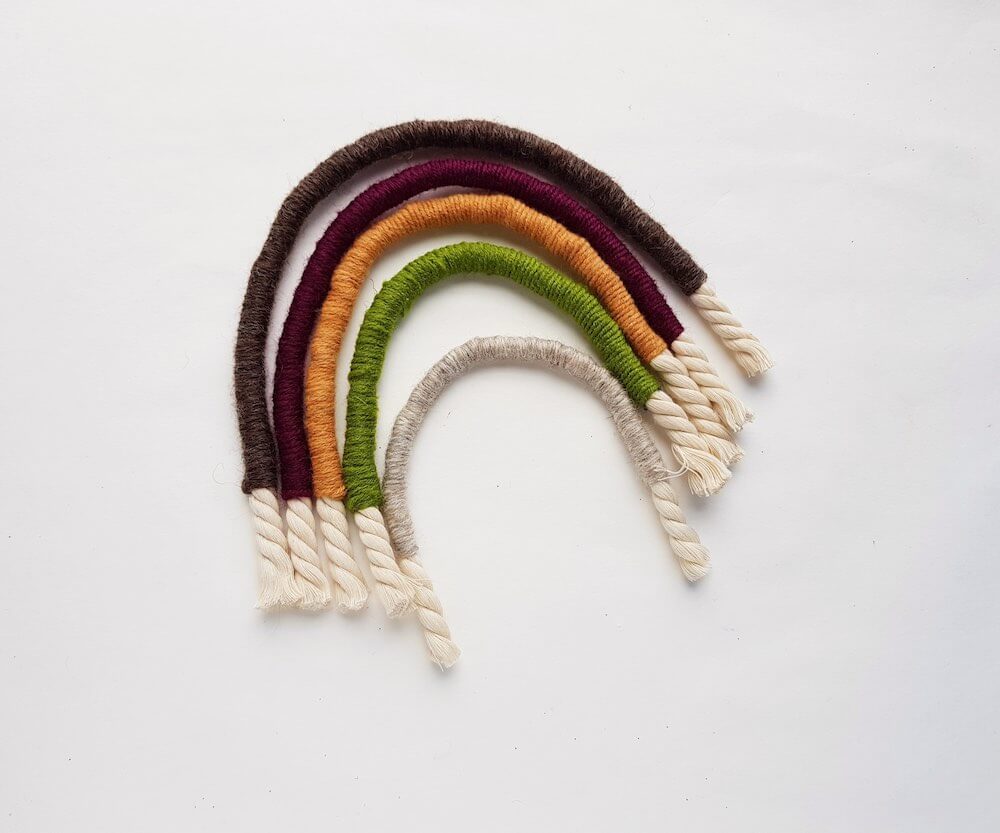
Similarly, cover the rest of the rope cutouts using yarn or string wrapping around the cords. 1 inch on both sides of the ropes must remain intact.
Step 7:

Cut out a felt base for the macramé rainbow.
Step 8:
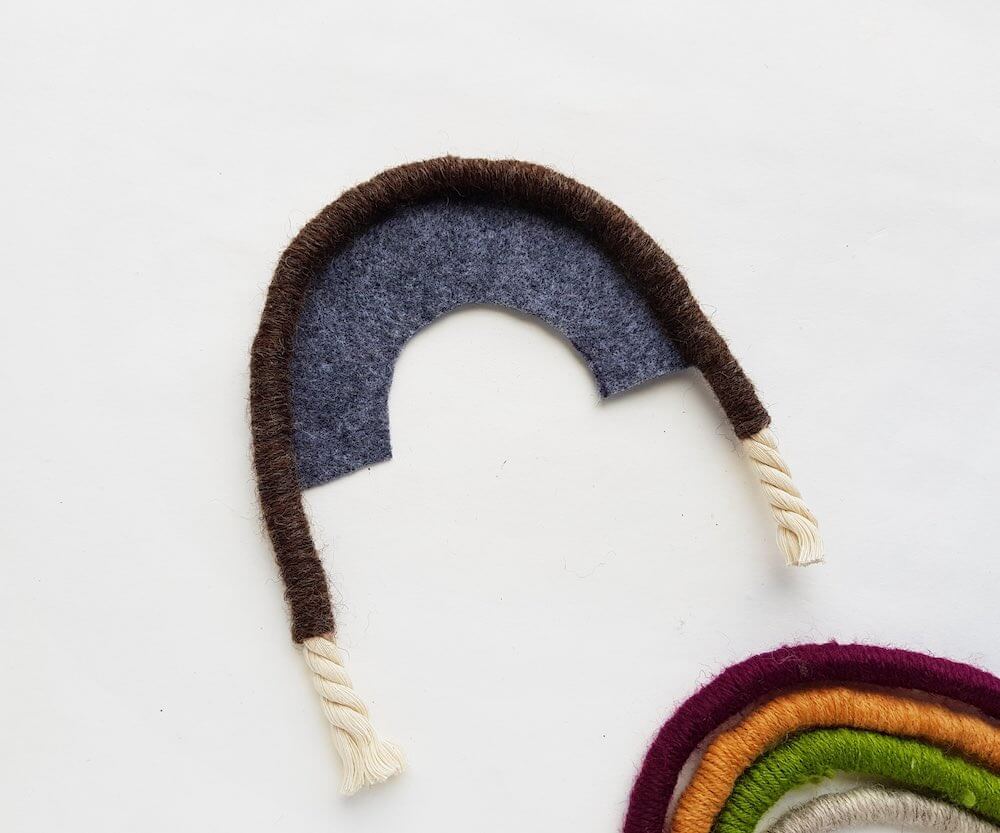
Use hot glue to attach the yarn-wrapped ropes to the rainbow felt base. Start from any one side (either top or bottom).
Step 9:
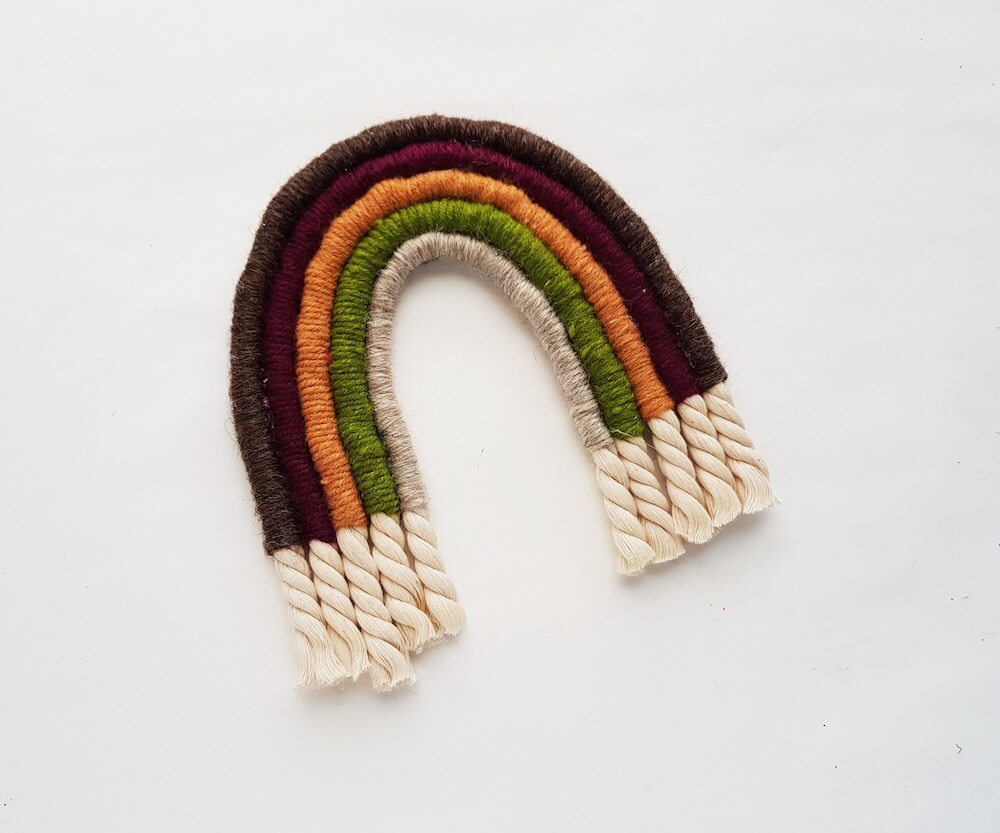
Attach all of the yarn-wrapped ropes on the felt base one by one.
Step 10:
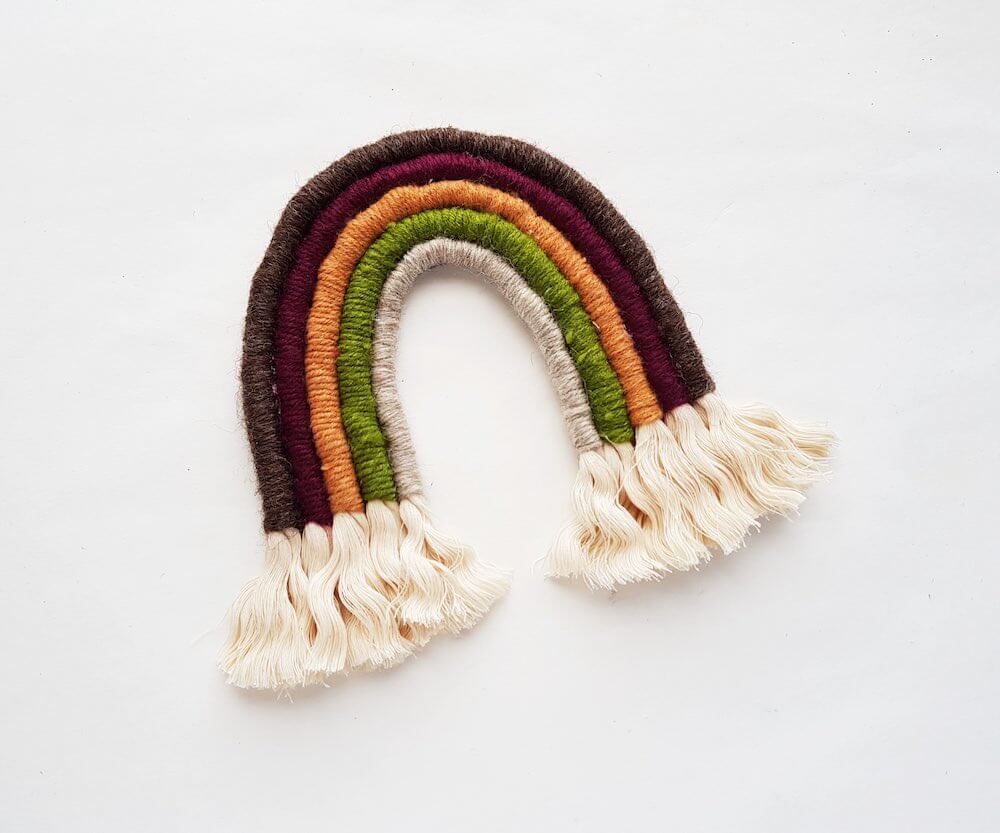
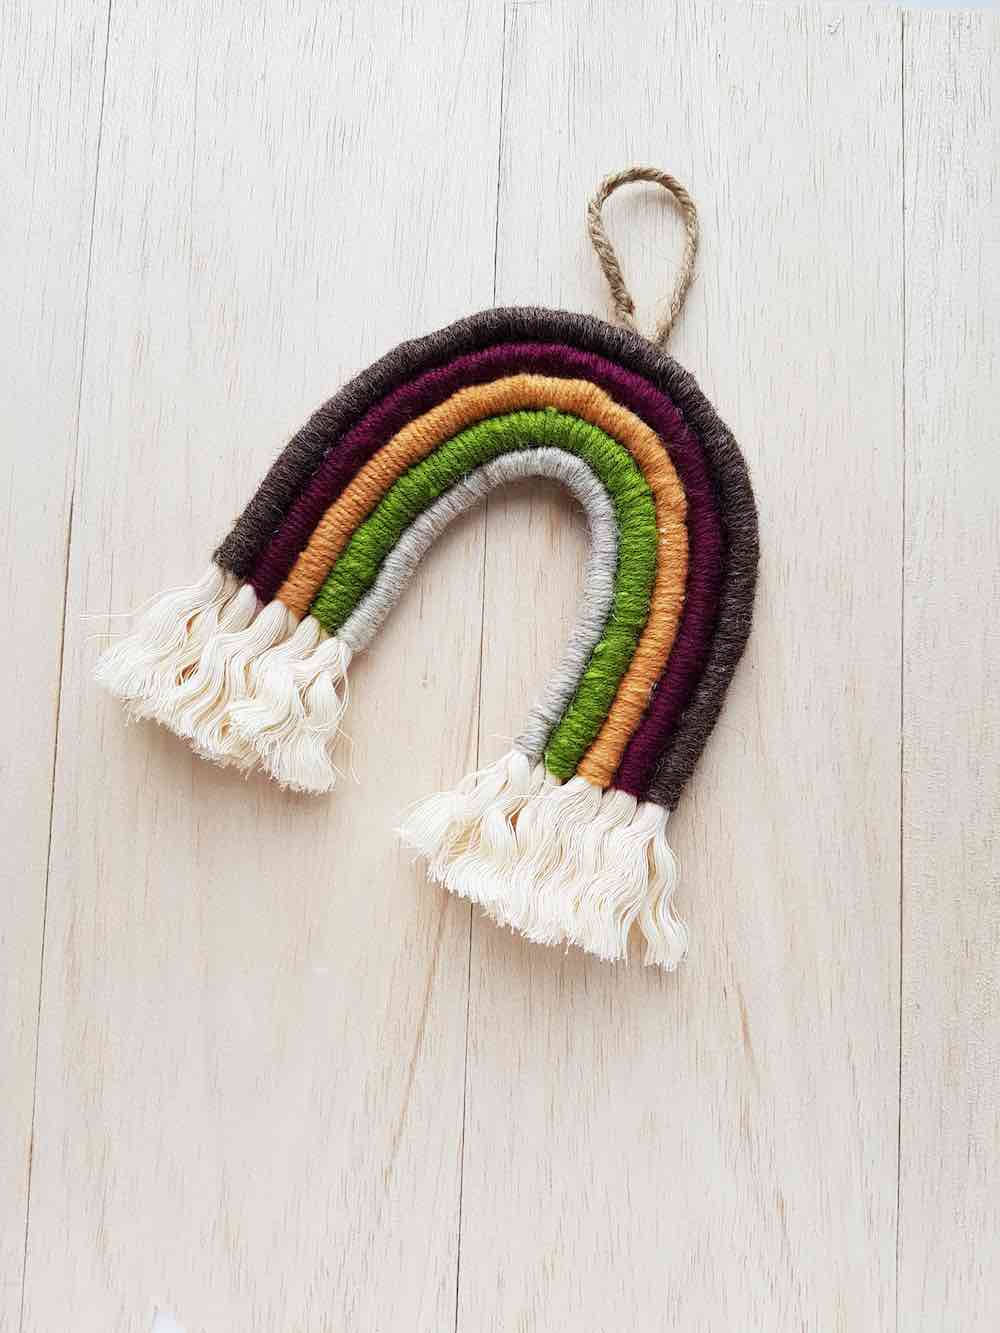
Open the twists of the ropes’ 1-inch open ends. Attach a hanging mechanism on the back side of the rainbow if you want to hang it on a wall or use it as a charm.
And that’s it! Now you know how to make a macrame rainbow wall hanging!
DIY Rainbow Macrame FAQs
You can make a DIY rainbow wall art with a variety of cords. I used a twisted rope for macrame rainbow that I made. But, you can try any thread or cords that you want and see how it turns out!
The nice thing about a rainbow macrame wall hanging DIY, you can add additional length or make it smaller if you please. For a mini macrame rope rainbow shape, make your rope length as short as you need for your desired look.
Some macrame rainbow tutorials will use wire, but for this rainbow macrame tutorial, no wire is needed! Wire can help keep the rainbow shape a lot better, but with the macrame rainbow instructions up above, you won’t have to worry about that.
If you haven’t done any rainbow macrame DIYs before, you will want to have some chunky yarn, a hot glue gun, thick cords, and felt to create your own macrame wall-hanging rainbow!
DIY Rainbow Macrame Wall Hanging Wrap Up
A macrame rainbow hanging is so cute and fluffy; it is the perfect gift to make that is also fun and isn’t too difficult. Next time you want to create something, try making this macrame rainbow DIY!
Loving these Macrame Rainbow Crafts for Adults? Check out my other Hawaii craft tutorials like How to Make a Poinsettia Wreath, Pineapple Centerpieces, and a Moana Paper Doll!
Rainbow Macrame Wall Hanging

Top Hawaii blogger, Hawaii Travel with Kids, features their Step by Step Tutorial to Make your own Macrame Rainbow Wall Hanging. Perfect for nurseries or home decor.
Materials
- Naturally twisted rope (1 cm thick)
- Twines and colorful yarns
- Felt
- Craft glue or hot glue
Tools
- Pencil
- Scissors
Instructions
- Decide the number of layers for the rainbow and cut ropes accordingly. Place the rope on a flat surface by forming a rainbow curve, measure, mark and cut the ropes for each layer of the macramé rainbow. I’m creating a macramé rainbow with 5 layers.
- Grab any one of the ropes. Leave an inch intact from an end of the rope and then tie a knot around the rope using a colorful yarn of your
choice. Do not cut the yarn from its bundle yet. - Align the short end of the tied yarn with the rope and wrap the rope
using the yarn. Keep the wrapping nice and adjacent; making sure that the rope is not visible. - Continue to wrap the yarn around the rope all the way to its other end but make sure to leave an inch intact on that end as well.
- Keep 2 or 3 inches of yarn and cut off the yarn string from its bundle.
Insert a tapestry needle through the open end of the yarn string. Draw the needle through the wrapped yarn (around the rope). Pull the needle out and cut off extra yarn if necessary. - Similarly cover the rest of the rope cutouts using yarn or string. 1 inch on both sides of the ropes must remain intact.
- Cut out a felt base for the macramé rainbow.
- Use hot glue to attach the yarn wrapped ropes on the rainbow felt base. Start from any one side (either top or bottom).
- Attach all of the yarn wrapped ropes on the felt base one by one.
- Open the twists of the ropes’ 1 inch open ends. Attach a hanging
mechanism on the back side of the rainbow if you want to hang it on a wall or use it as a charm.