
Planning a backyard Hawaiian luau and want to create your own Hawaiian luau decorations? Scroll to find out how to DIY a pineapple centerpiece using a soda can and paper with this Cricut Hawaiian paper craft.
This Hawaiian Luau Pineapple Centerpiece tutorial about how to make a pineapple centerpiece contains affiliate links which means if you purchase something from one of my affiliate links, I may earn a small commission that goes back into maintaining this blog.
Whether you are throwing a backyard summer get-together, a graduation party, to celebrating a birthday, nothing screams summer like a Hawaiian luau!
There’s a reason why luau theme party ideas are always a popular summer party theme. I mean, who doesn’t want an opportunity to wear the Hawaiian dresses and Aloha shirts they bought on their last Hawaiian vacation?
While having yummy Hawaiian food and Hawaiian music are party essentials, nothing sets the scene better than Hawaiian luau decorations.
Now, you can always stop by your local party store and see what they have. Their selection is probably hit/miss, and it might take a while to find enough of the “good” decorations.
If you really want your Hawaiian luau decorations to stand out from other people’s parties, the best way to do that is by creating your own luau party centerpieces!
I know there are a lot of different pineapple centerpiece ideas out there on Pinterest. Some involve using fresh pineapple, and others are made from other materials.
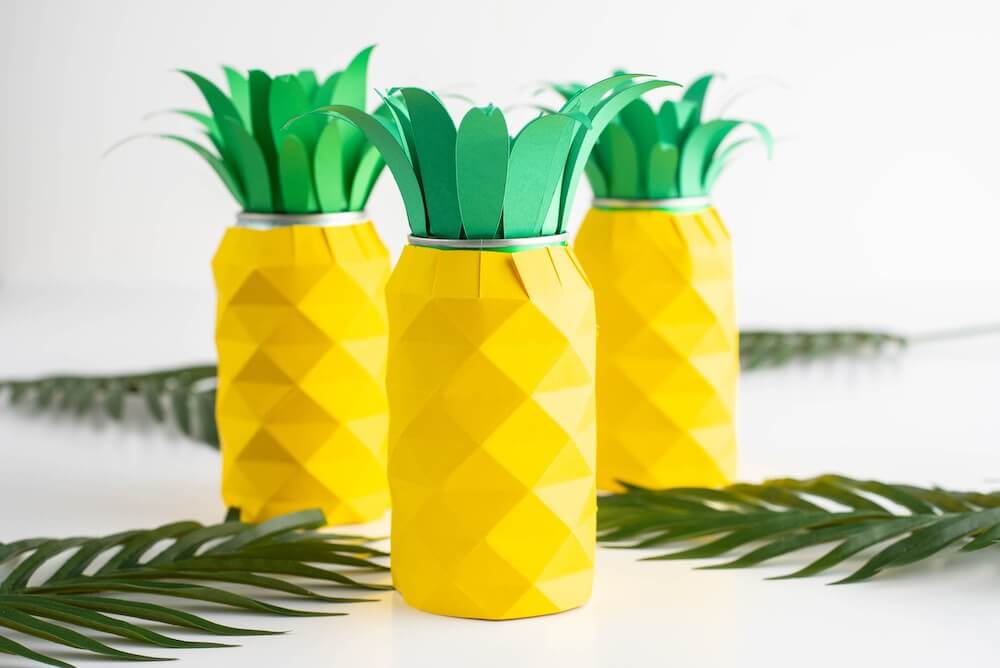
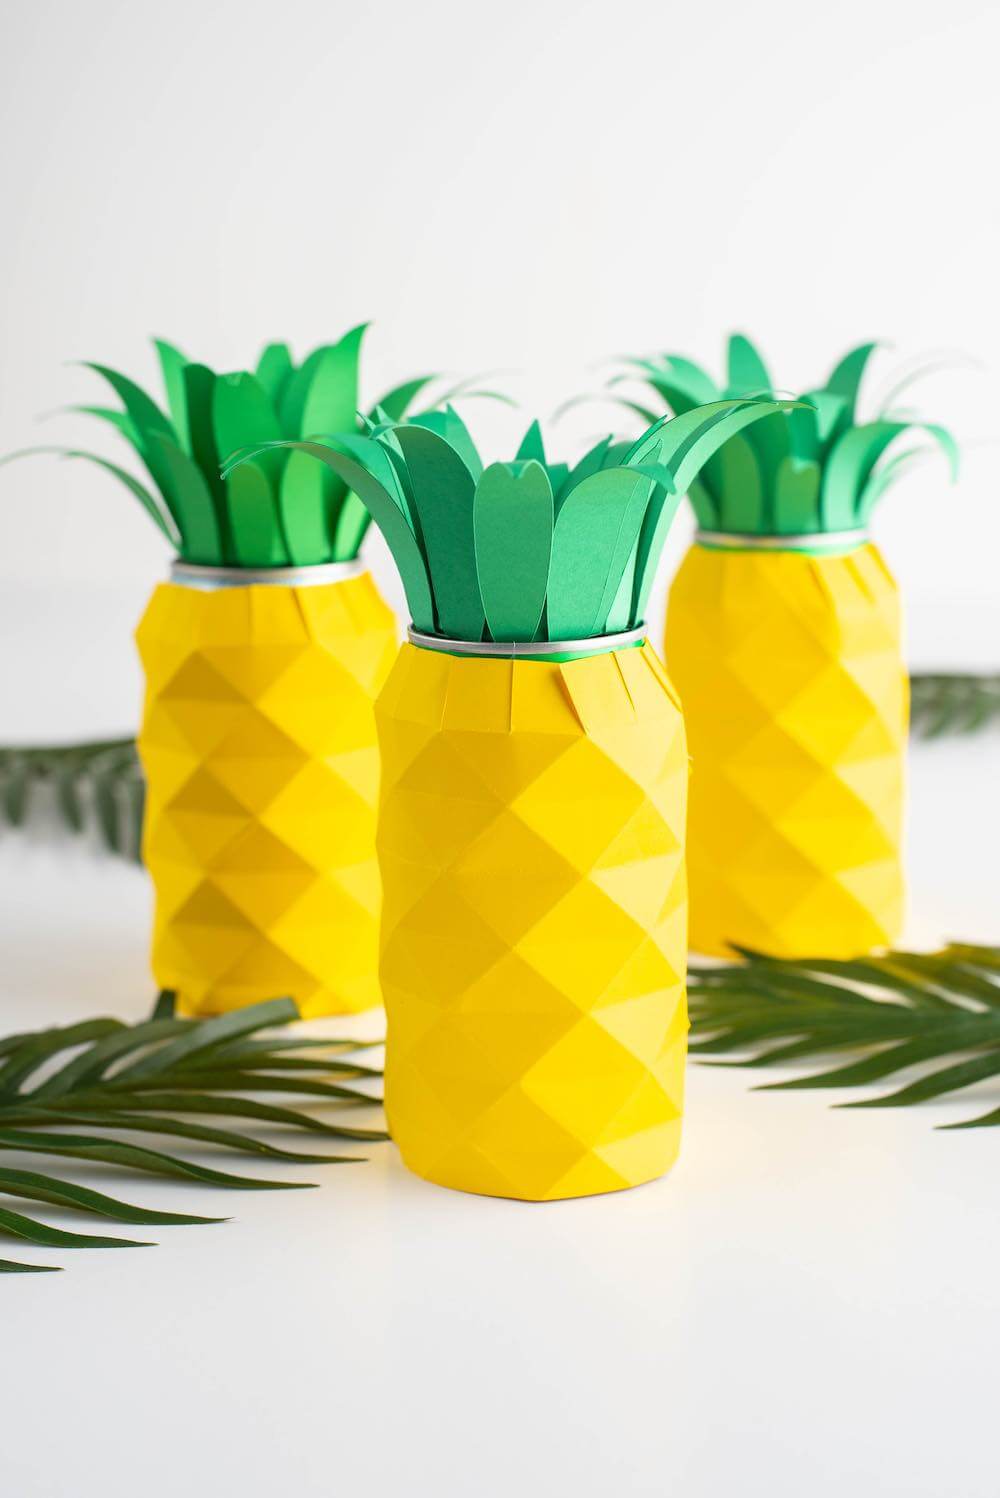
This Hawaiian pineapple centerpiece craft is definitely something people will stop and ask you all about. They are super cute, and they will help weigh down your tablecloth. Adorable and functional pineapple table decorations; you can’t get much better than that!
And at the end of the night, you can offer them up as luau party favors. I mean, they still contain a yummy beverage inside!
So, let me show you how you can DIY a Hawaiian luau centerpiece, and these will quickly become your favorite Hawaiian decorations to make.
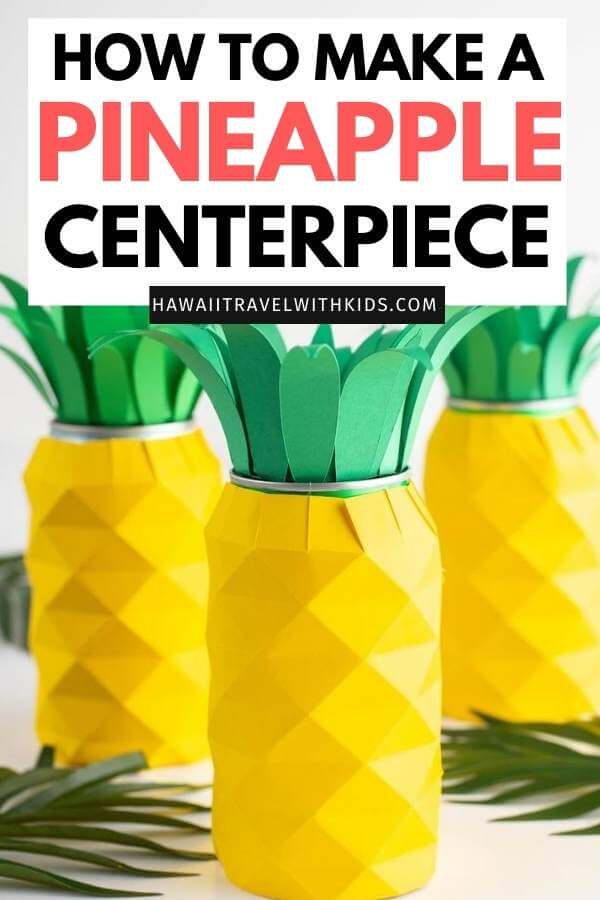
Hawaiian Luau Decorations: How to Make a Pineapple Centerpiece
This Hawaiian luau centerpiece craft uses a Cricut machine. It’s essential. If you don’t have one, try to borrow one from a friend.
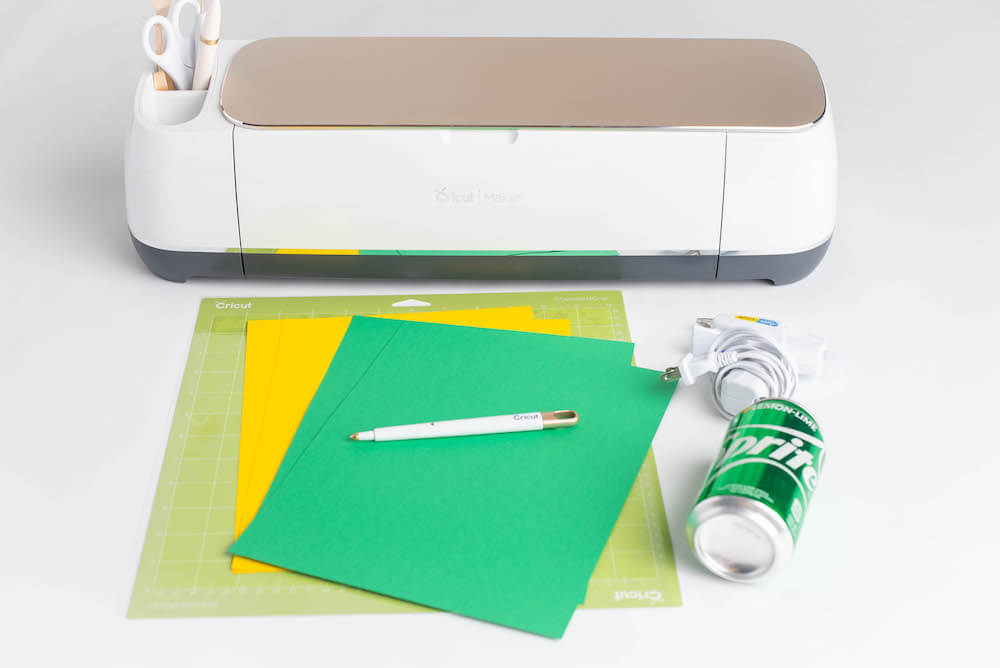
Pineapple Centerpiece Materials:
- Cricut or other cutting machine
- Cricut scoring wheel or scoring stylus
- Card stock (8.5×11” 65-80lb) yellow and green
- Cricut blue light or green standard grip mat
- Hot glue gun and glue sticks
- Soda cans
Free Downloadable SVG File for Cricut Pineapple
DIY Hawaiian Luau Centerpiece Instructions:
Here is how to quickly make these pineapple table decor that would be perfect for Hawaiian centerpieces for your luau or Hawaiian party.
Step 1:
The first thing you need to do is upload the SVG file to design space. Make sure to click “ungroup” on the layers panel.
Then, you’ll want to select the two yellow circles for the pineapple crown as well as the crisscross lines layer of the pineapple.
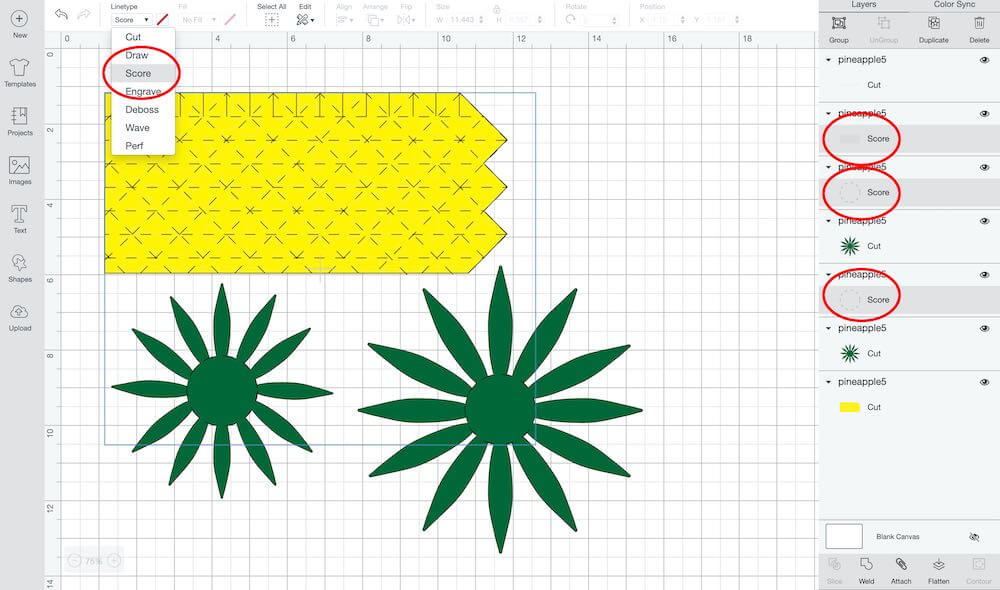
Once they all are selected, click “line type” (which is located towards the left in the top toolbar.) Click the drop-down menu and click “score.”
Important info: I know this might sound confusing, but this is crucial. You’ll need to score the circle on the inside of the pineapple crown in order to fold the leaves and secure it to the top of the can. You also need to score the lines of the pineapple to create the dramatic pineapple points.
And whatever you do, do NOT select the cut lines at the very top of the pineapple. These need to stay as cut lines so we can fit them around the soda can. Make sense?
Step 2:
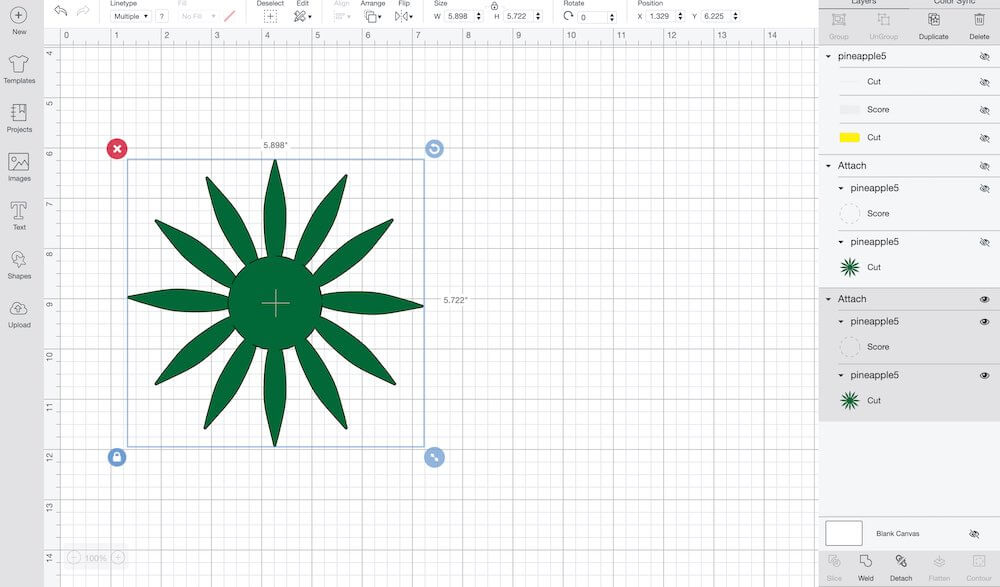
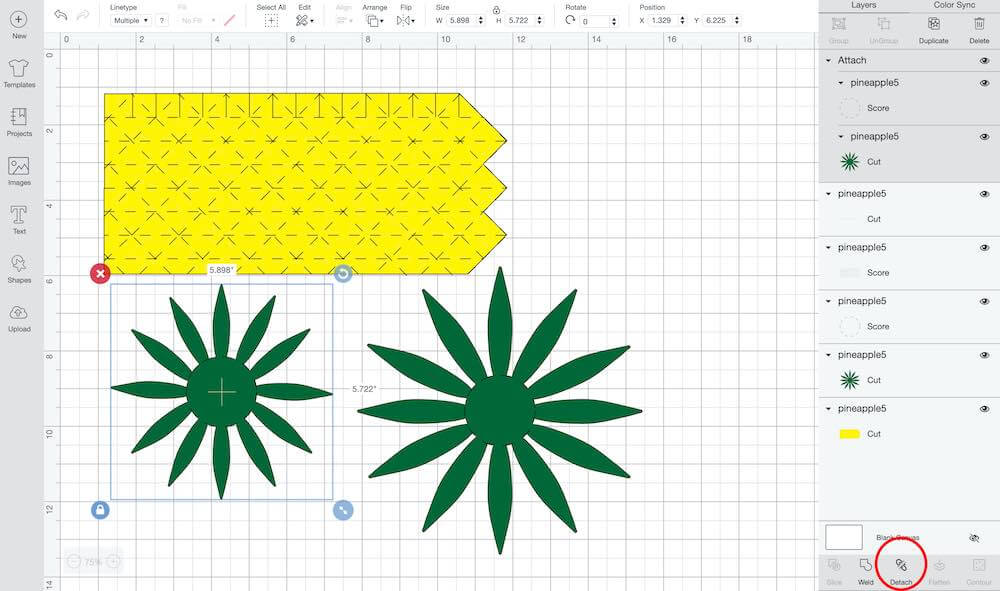
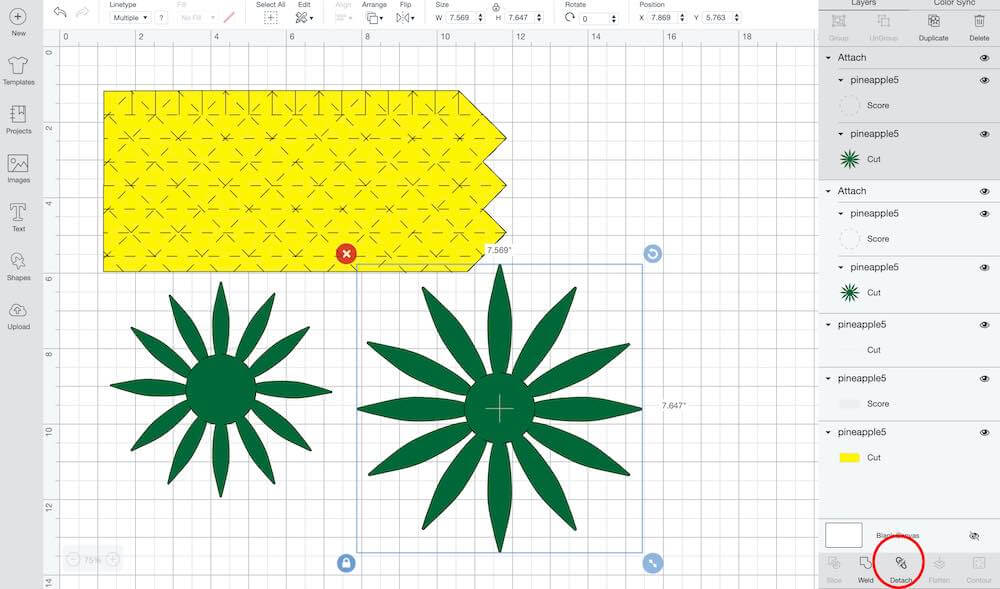
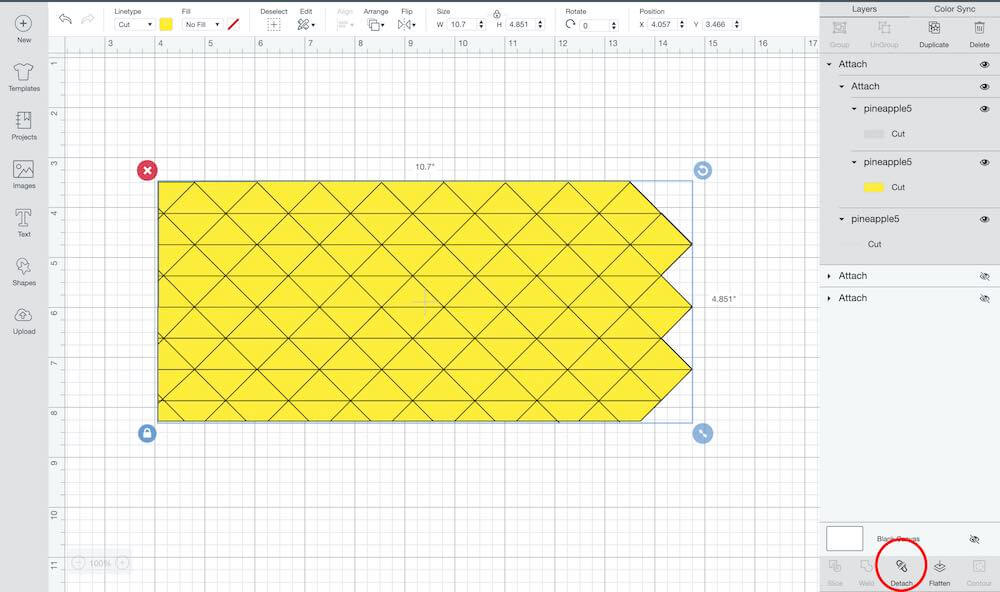
Ok, let’s move on. Select the circular score line and smaller crown layer and click “attach.” You’ll want to hide that layer until you’re ready to cut.

Next, select the circular score line and larger crown layer and click “attach.” Again, we’re going to hide this layer until you are ready to cut.

Now, select the yellow pineapple cut layer, the score lines for the pineapple, and the small lines layer that cuts at the top of the pineapple. Click “attach.”
Step 3:
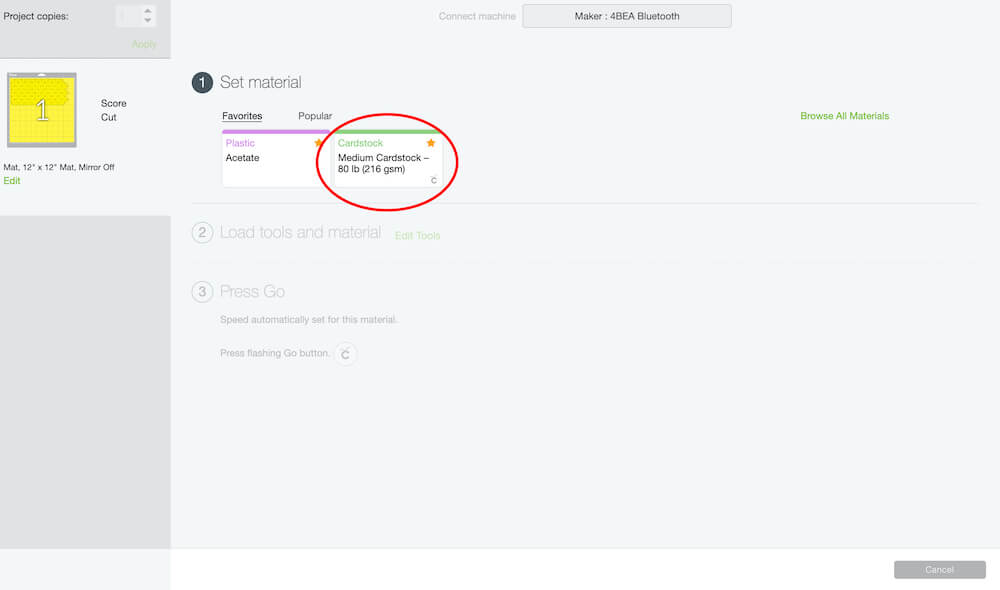
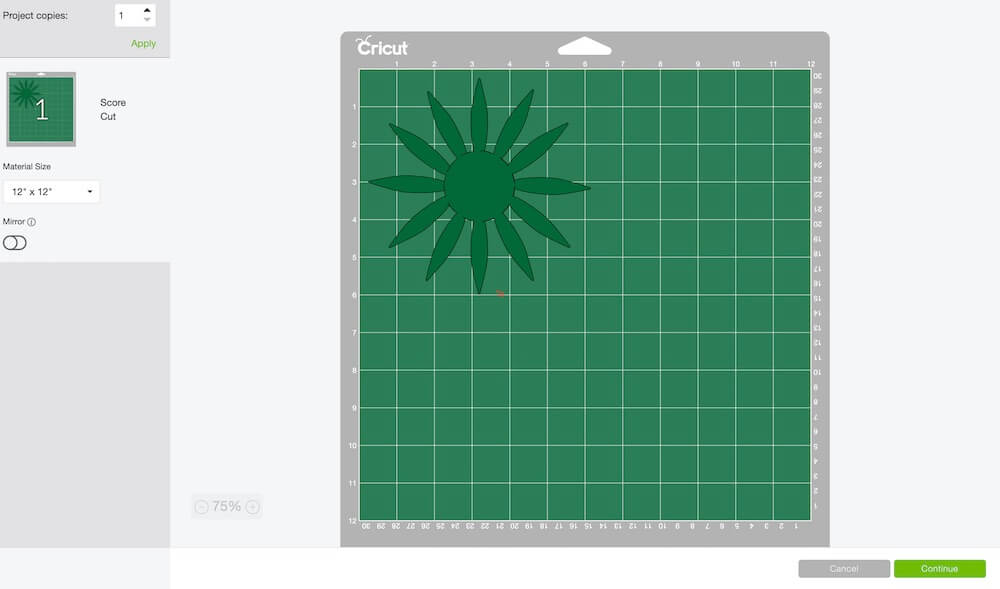
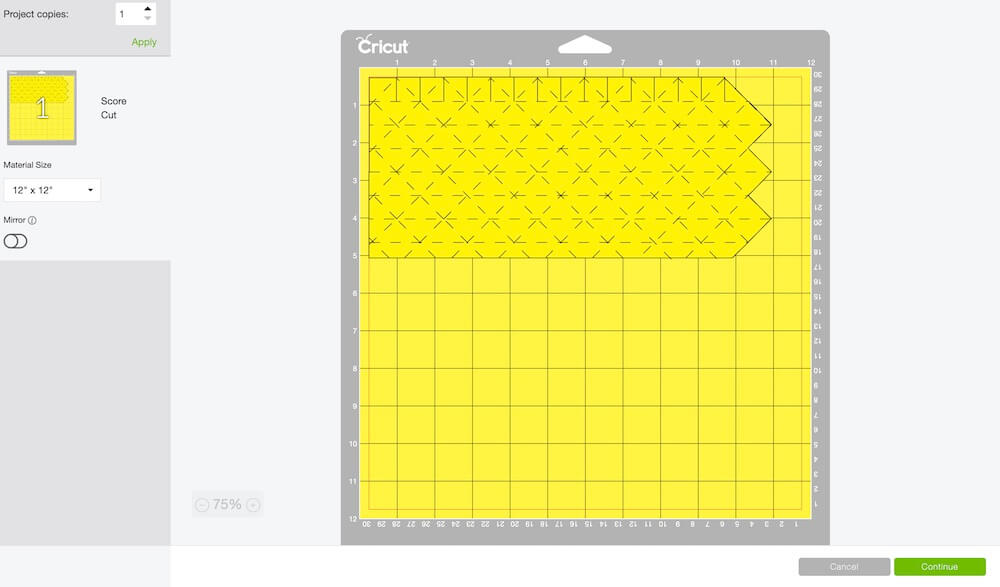
Once you do that, click “make it” to cut the pineapple layer first. You’ll want to adjust your material dial/setting to “medium card stock” and then load the card stock onto a blue or green grip mat.
Adjust your tool to either the scoring wheel or scoring stylus and load it into the machine when it prompts you.
Click the flashing “go” button, and it should start cutting your materials!
Step 4:
After it’s cut, return back to the canvas. You’re going to turn the pineapple layer off and repeat to cut the crown layers.
Step 5:
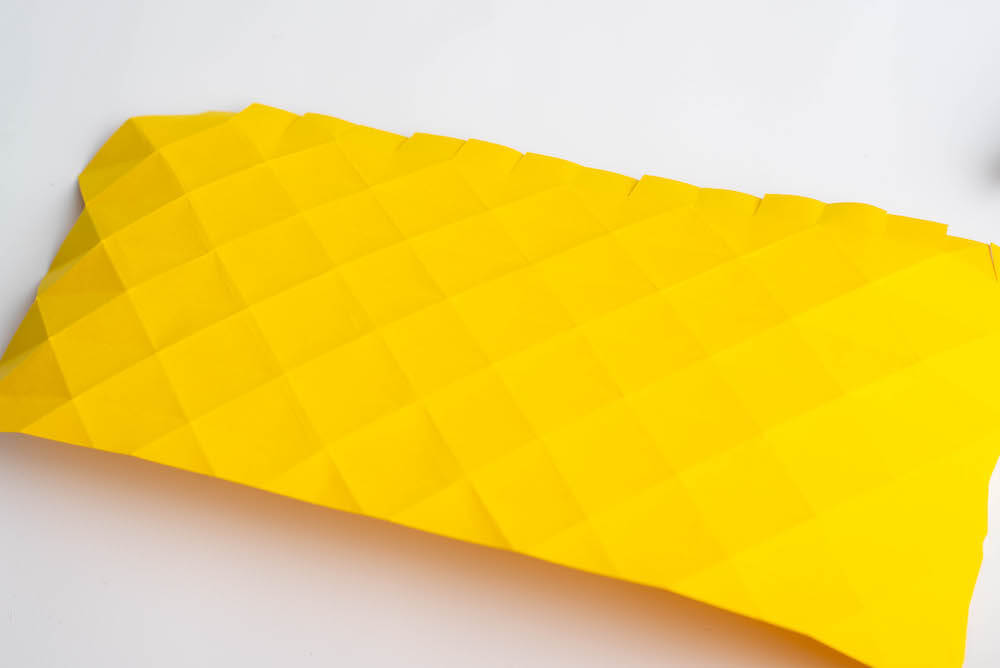
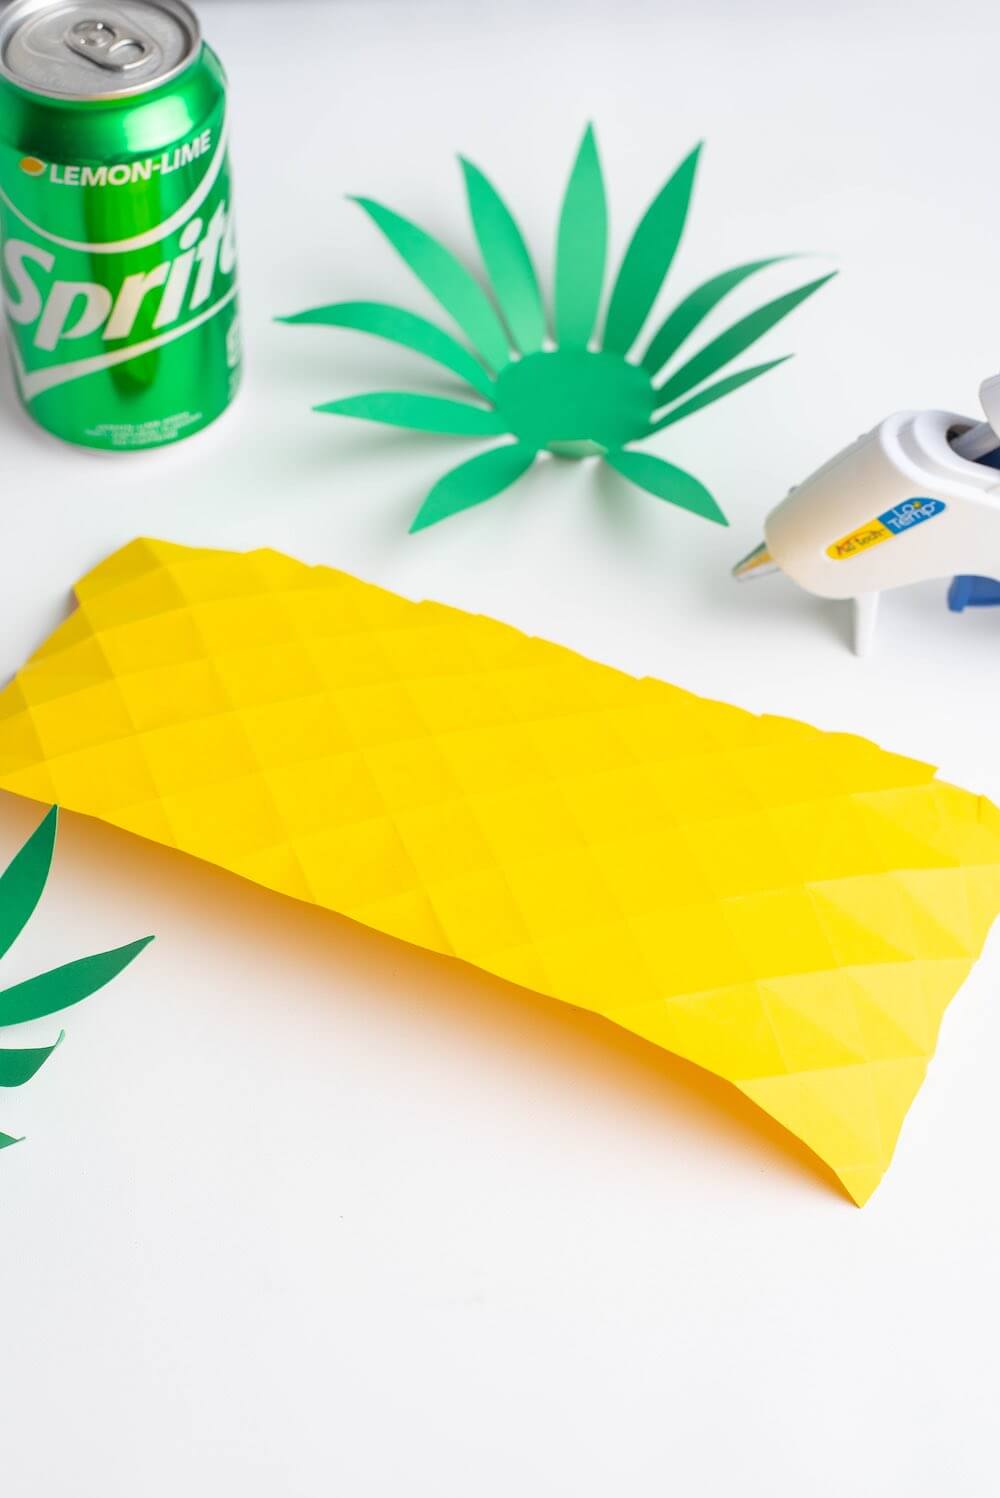
Ok, now that you’ve cut all the pieces, it’s time to fold the pineapple piece. You’re going to fold all the straight lines first. These straight lines will all be mountain folds.

When you are done with those, we’ll move on to the diagonal lines. These diagonal lines will all be valley folds.
For the pineapple crown, fold all the stems inward. You can use the handle of a spoon or a bone folder to curl the tips of the crown leaves. This will give your pineapple a bit more dimension.
Step 6:
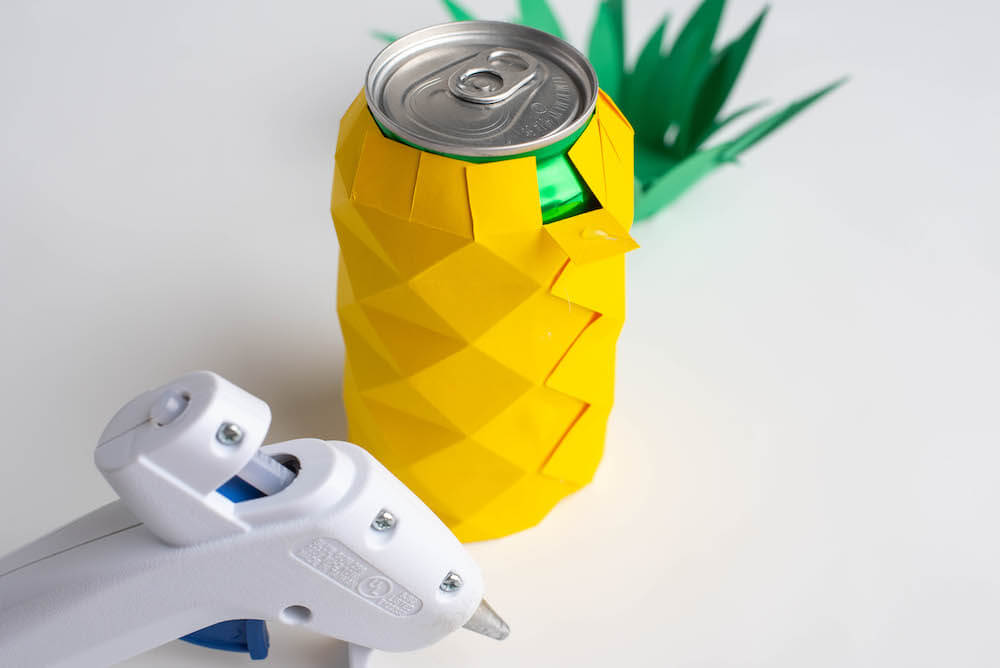
Grab your soda can and glue the pineapple piece around the can. The side with the three triangles will line up with the points of the pineapple where it needs to be glued.
Use a hot glue gun to attach these points to close up this part.
Step 7:
For the final steps, you’ll want to hot glue the large crown inside and on top of the small crown. After you’ve layered them, glue them to the top of the can.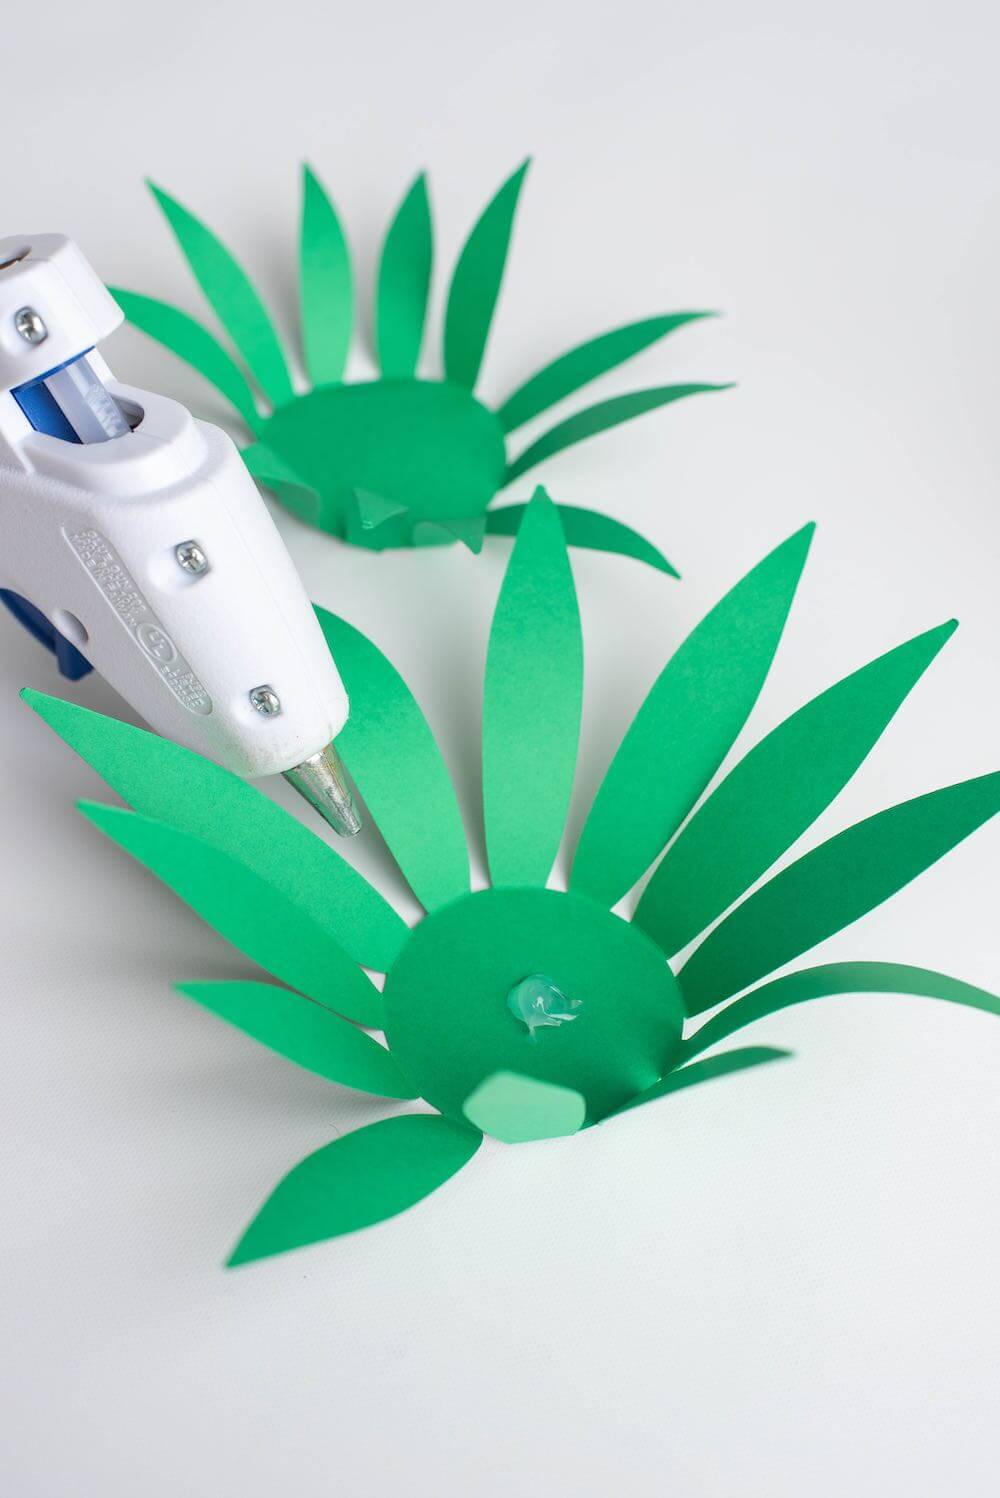
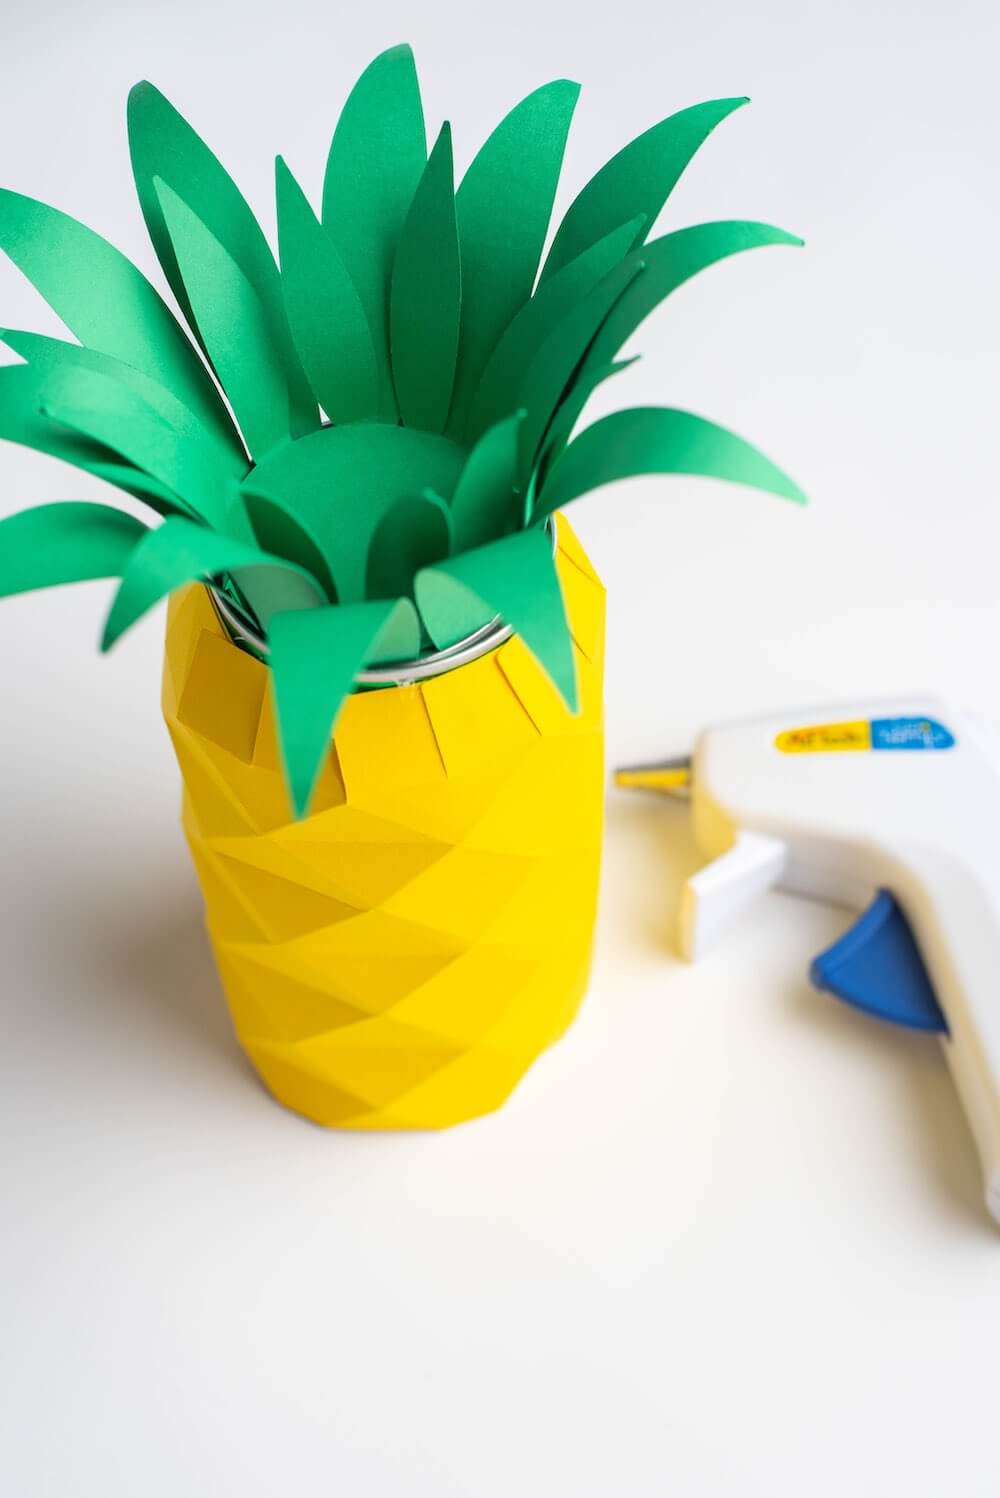
That’s it! Repeat as many times as you like to create multiple Hawaiian luau pineapple centerpieces.
Paper Pineapple Centerpiece FAQs
While you can use a pineapple as your centerpiece, if you have a big party or celebration, that’s a lot of pineapples, which adds up fast. You can get all the pineapple out and use it as a vase for flowers. These Hawaiian-theme centerpieces are a more efficient and cost-friendly pineapple centerpiece that you and your guests will love!
You will find plenty of pineapple decoration ideas all over Pinterest. Many of these products are beautiful, but if you only use paper and cardboard for your pineapples, they can easily be knocked down and ruined. This centerpiece for a luau party uses card stock and a soda can to make pineapples that are sturdier and just as pretty!
Yes. Without the Cricut, you won’t be able to get the precise measurements and cut-outs needed for these pineapple centerpieces.
Pineapple Centerpiece Wrap Up
These would be perfect luau centerpiece ideas for a family-friendly fun night for your next party.
The finished product is so easy to make. Your guests at the tropical party you are hosting will love them!
You can even create this for any Hawaiian-themed party, including a Hawaii Christmas luau!
Make these along with some DIY palm tree centerpieces or other luau decor, and eat all the delicious Hawaiian food and desserts, and you will have a true Hawaiian party for your family.
Loving this Pineapple Centerpiece Tutorial and looking for more DIY Hawaiian luau party ideas? Check out my posts about the best Hawaiian music, my favorite Hawaiian recipes, and how to create Hawaiian experiences at home!
DIY Hawaiian Luau Decorations: Pineapple Centerpiece (Cricut Craft)

Planning a Hawaiian luau and want to make some adorable Hawaiian luau centerpieces? Find out how to make this super cute pineapple centerpiece using a Cricut, paper, and a soda can.
Materials
- Card stock (8.5x11” 65-80lb) yellow and green
- Cricut blue light or green standard grip mat
- Soda cans
Tools
- Cricut or other cutting machine
- Cricut scoring wheel or scoring stylus
- Hot glue gun and glue sticks
Instructions
- The first thing you need to do is upload the SVG file to design space. Make sure to click "ungroup" on the layers panel.
- Then, you'll want to select the two yellow circles for the pineapple crown as well as the crisscross lines layer of the pineapple.
- Once they all are selected, click "line type" (which is located towards the left in the top toolbar.) Click the drop down menu and click "score."
- Important info: I know this might sound confusing, but this is crucial. You'll need to score the circle on the inside of the pineapple crown in order to fold the leaves and secure it to the top of the can. You also need to score the lines of the pineapple to create the dramatic pineapple points.
- And whatever you do, do NOT select the cut lines at the the very top of the pineapple. These need to stay as cut lines so we can fit it around the soda can. Make sense?
- Ok, let's move on. Select the circular score line and smaller crown layer and click "attach." You'll want to hide that layer until you're ready to cut.
- Next, select the circular score line and larger crown layer and click "attach." Again, we're going to hide this layer until you are ready to cut.
- Now, select the yellow pineapple cut layer, the score lines for the pineapple, and the small lines layer that cut at the top of the pineapple. Click "attach."
- Once you do that, click "make it" to cut the pineapple layer first. You'll want to adjust your material dial/setting to "medium card stock" and then load the card stock on to a blue or green grip mat.
- Adjust your tool to either the scoring wheel or scoring stylus and load it into the machine when it prompts you.
- Click the flashing "go" button and it should start cutting your materials!
- After it's cut, return back to the canvas. You're going to turn the pineapple layer off and repeat to cut the crown layers.
- Ok, now that you've cut all the pieces, it's time to fold the pineapple piece. You're going to fold all the straight lines first. These straight lines will all be mountain folds.
- When you are done with those, we'll move on to the diagonal lines. These diagonal lines will all be valley folds.
- For the pineapple crown, fold all the stems inward. You can use the handle of a spoon or a bone folder to curl the tips of the crown leaves. This will give your pineapple a bit more dimension. Note: If you get confused, just refer to these photos and the screen shot with the folding guide.
- Grab your soda can and glue the pineapple piece around the can. The side with the three triangles will line up with the points of the pineapple where it needs to be glued.
- Use a hot glue gun to attache these points to close up this part.
- For the final steps, you'll want to hot glue the large grown inside and on top of the small crown. After you've layered them, glue them to the top of the can.
- That's it! Repeat as many times as you like to create multiple Hawaiian luau centerpieces.