

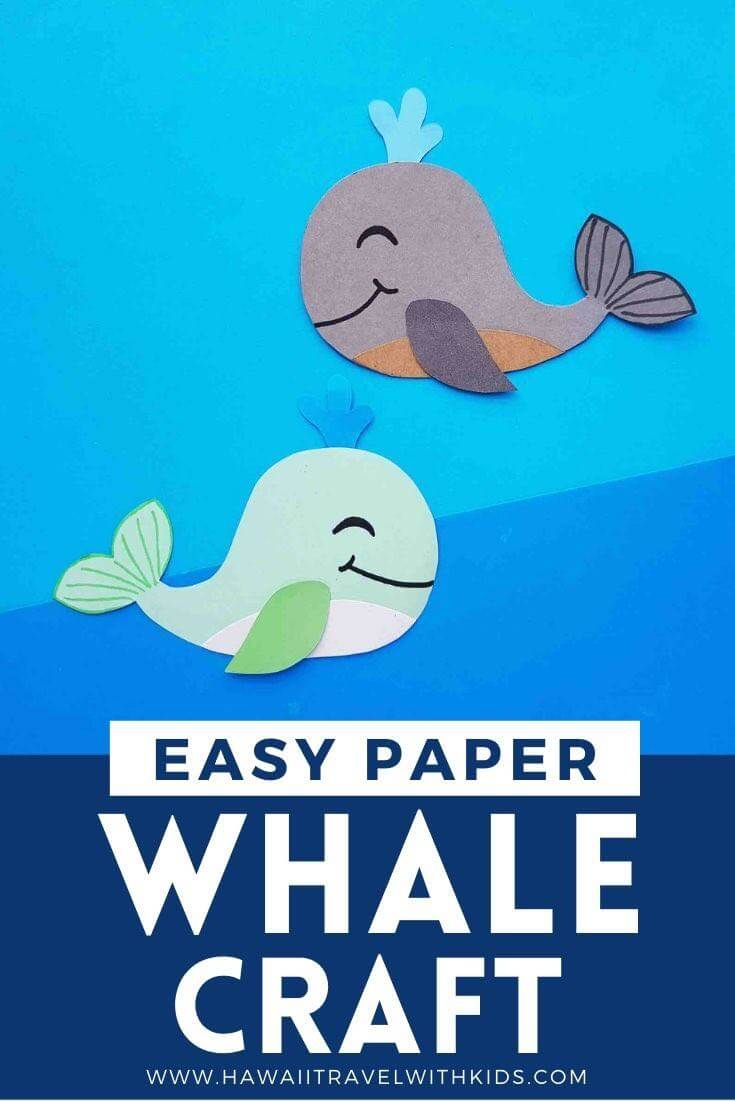
Looking for a super cute ocean art activity? Keep scrolling to learn how to make whale crafts out of paper!
This tutorial about how to make whale crafts out of paper contains affiliate links which means if you purchase something from one of my affiliate links, I may earn a small commission that goes back into maintaining this blog.
My family is pretty obsessed with Hawaii! We love the beaches, the culture, the attractions, and all the things that live there!
Winter is when people can go whale watching in Hawaii. That’s when the whale migration takes place.
Since we can’t be in Hawaii this winter, I thought we’d bring a little Hawaii home with this super cute whale craft for kids.
All you need is some colorful paper, a Sharpie, a pencil, a glue stick, and scissors. It’s just 5 steps, and the final result is pretty adorable.
Keep scrolling to find out how to make a whale out of paper! Plus, get my free whale template!
Paper Whale Craft Tutorial
Materials
- Colored craft paper
- Craft glue
- Sharpie
- Pencil
- Scissors
- Whale Template

How to Make a Whale Paper Craft
STEP 1:
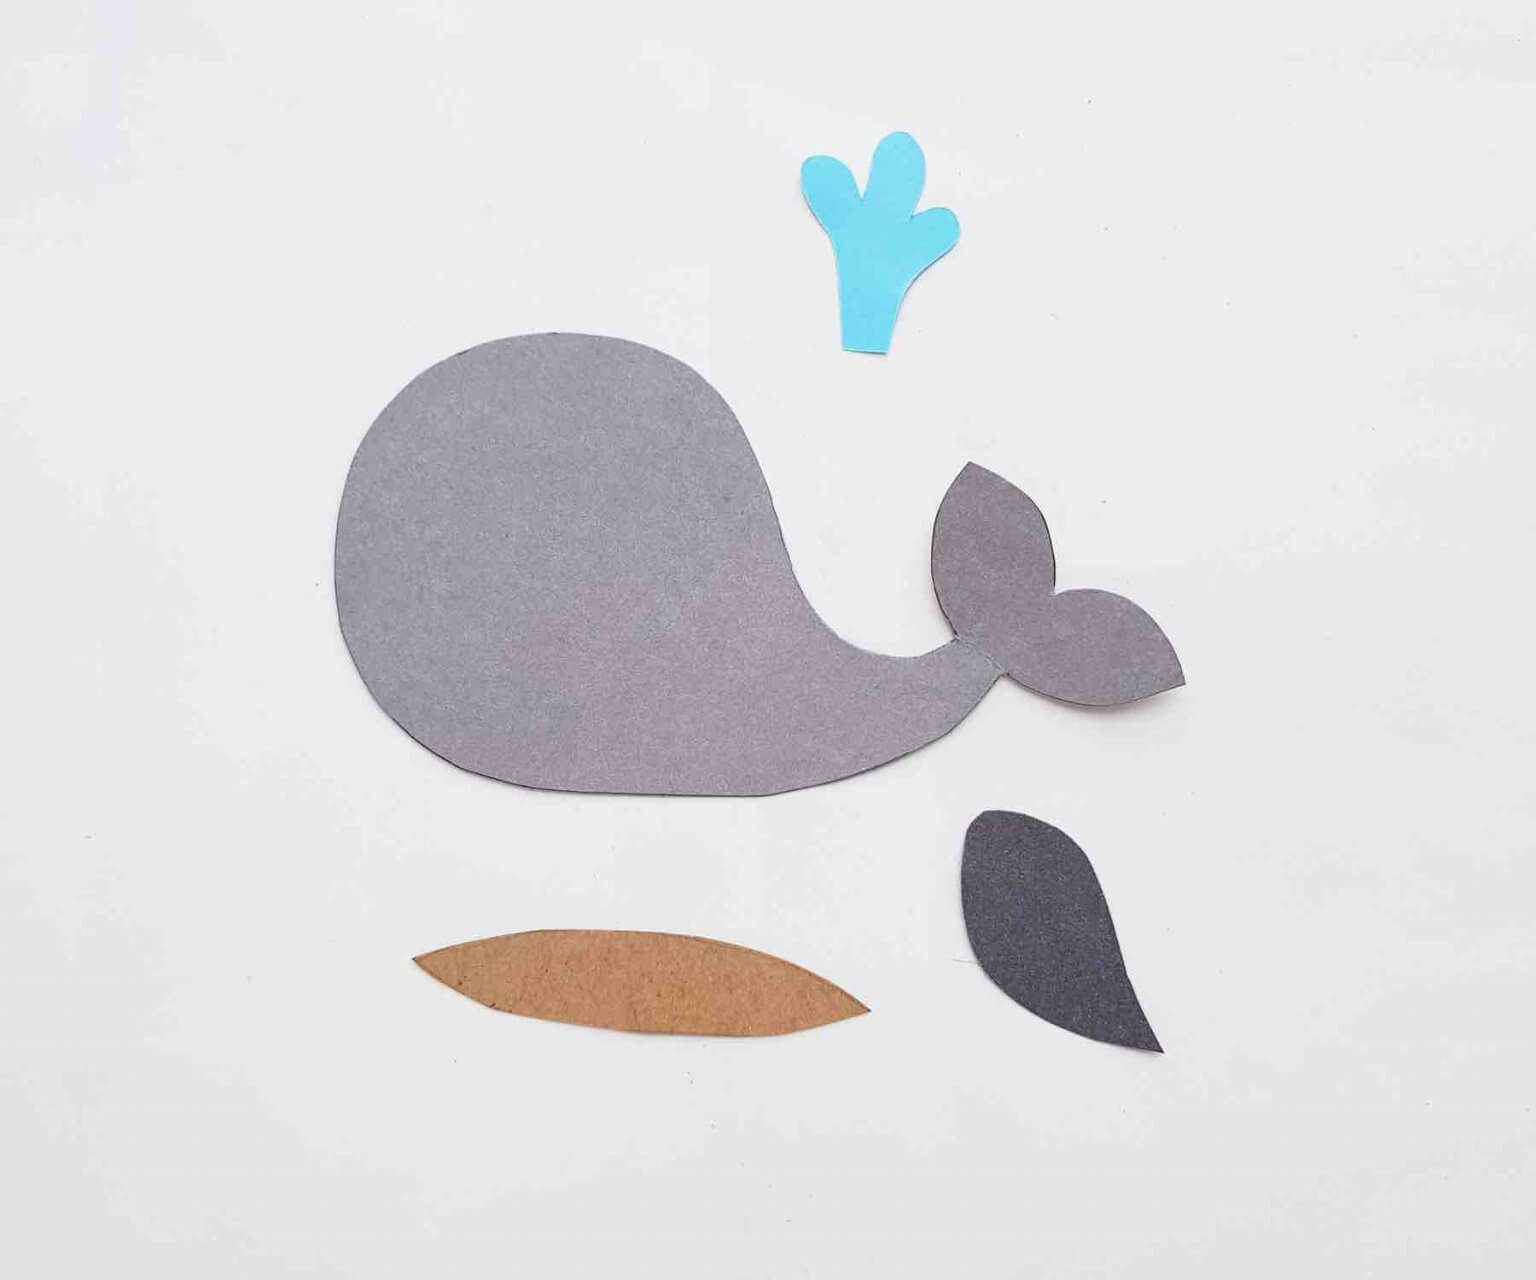
Print the whale template and select blue, brown (or pink), and 2 different shades of grey-colored craft papers.
Trace the water splash pattern on the blue paper, and the lens-like pattern (bottom side of the whale) on the brown (or pink) paper.
Trace the body base on any one of the grey colored paper and the fin pattern on the other grey paper. Cut out the traced patterns nicely.
STEP 2:
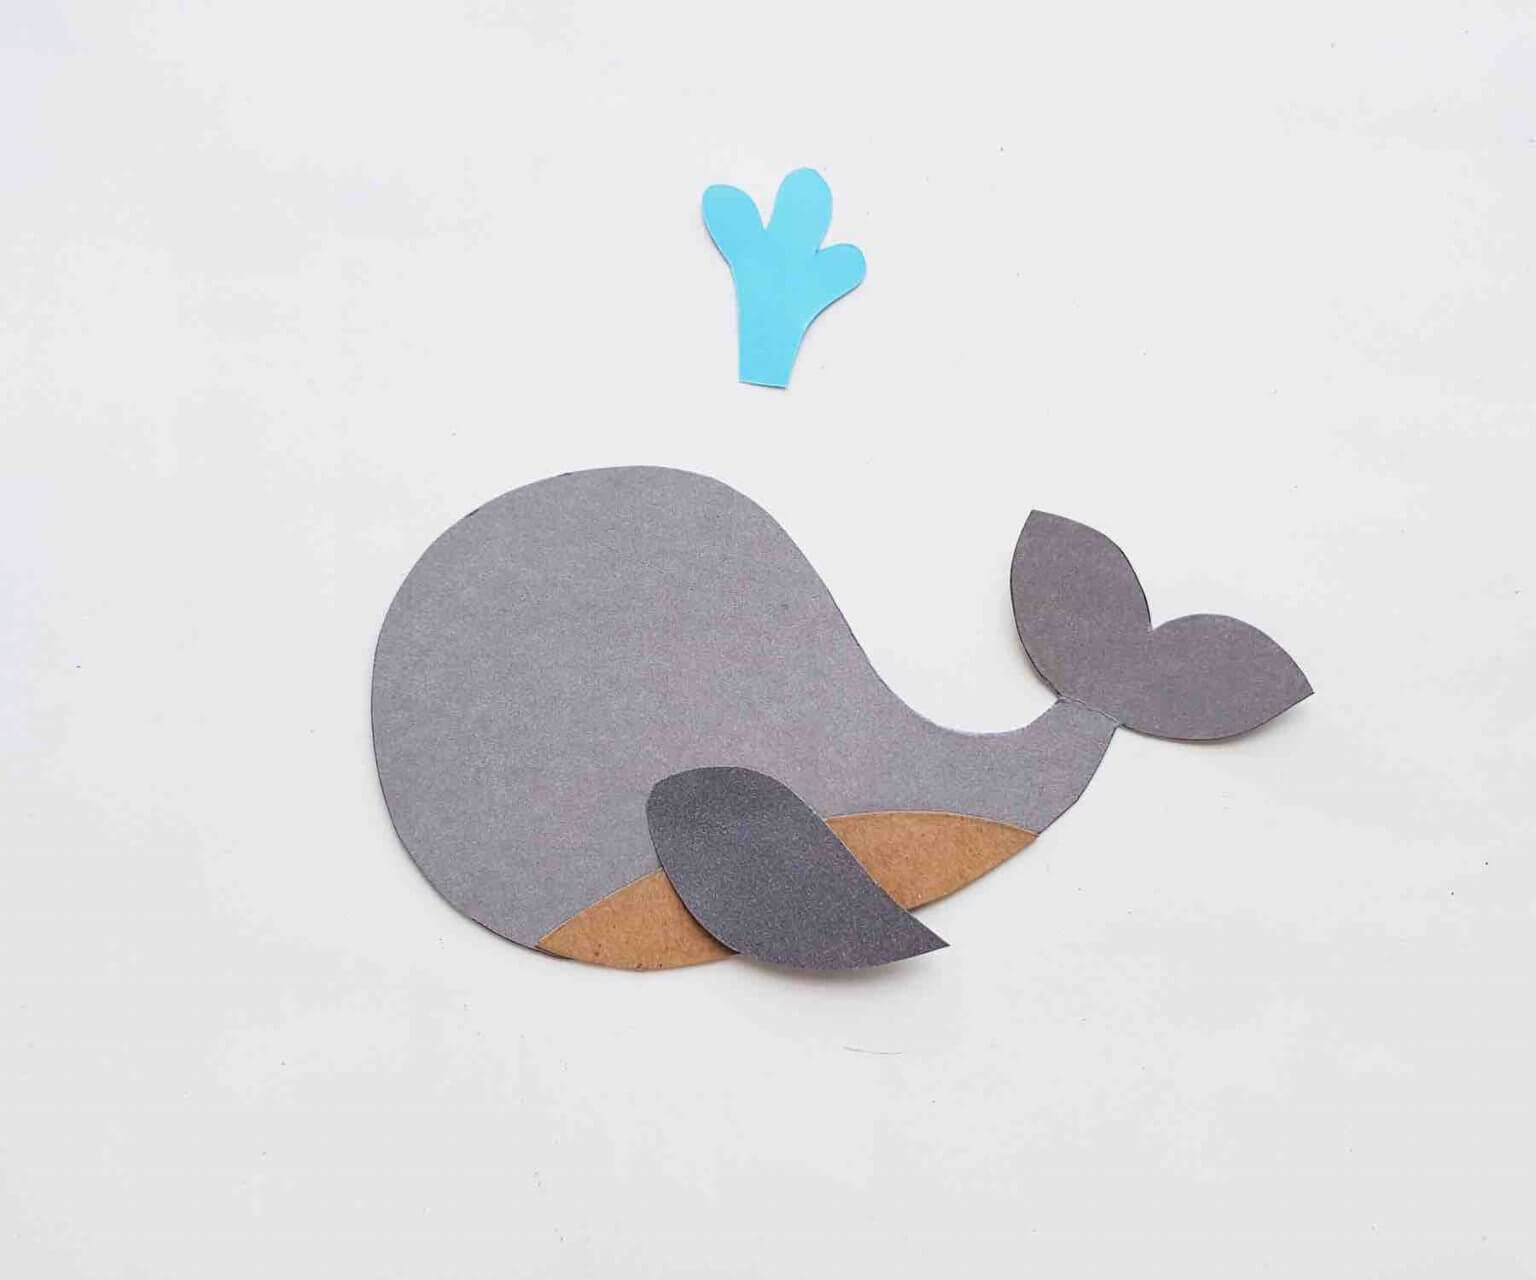
Stick the lens-like pattern along the bottom side of the whale body base to create the belly.

STEP 3:
Attach the fin pattern over the bottom part of the paper whale. You can either glue it completely down or let it stick out a bit for a 3D effect.
STEP 4:
Attach the water splash pattern on the top side of the head part of the paper whale.

STEP 5:
Use a black Sharpie to draw the eyes, mouth, and other details of the paper whale to complete the craft.

And that’s it! Such a simple craft for kids to make. Play around with different color combinations just for fun.
Add a craft stick to turn it into a puppet or glue it on a gift bag as decoration for an Under the Sea party!

How to Make Whale Crafts FAQs
You can probably follow the way we made our paper whales and just have a stronger whale! It will be thicker but will last longer!
Drawing a whale is fairly easy to do! All you need to do is draw the body, tail, and fin! Then make sure to color in the eyes and mouth.
Making an origami whale can be fairly simple but might be too hard for younger kids.
Looking for more Hawaii craft ideas? Learn how to make an origami shark, Hello Kitty paper craft, a paper lei, paper palm tree, paper plumeria flower, and pineapple centerpieces!
How to Make Whale Crafts Out of Paper
Learn how to make whale crafts using colored paper, a sharpie and clue. Super cute classroom activity or to do at home with kids.
Materials
- Colored craft papers
- Craft glue
- Sharpie
Tools
- Pencil
- Scissors
Instructions
- Print out the whale template and select blue, brown (or pink) and 2 different shades of grey colored craft papers. Trace the water splash pattern on the blue paper, the lens-like pattern (bottom side of the whale) on the brown (or pink) paper. Trace the body base on any one of the grey colored paper and the fin pattern on the other grey paper. Cut out the traced patterns nicely.
- Stick the lens-like pattern along the bottom side of the whale body base.
- Attach the fin pattern over the bottom part of the paper whale.
- Attach the water splash pattern on the top side of the head part of the paper whale.
- Use a black sharpie to draw the eyes, mouth and other details of the paper whale to complete the craft.